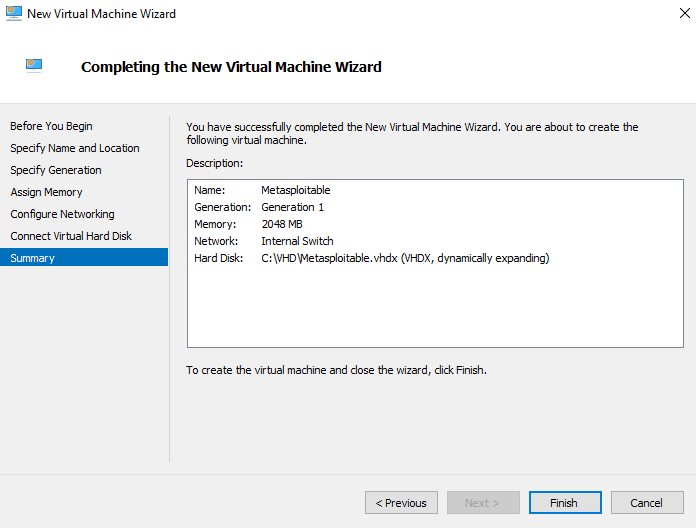
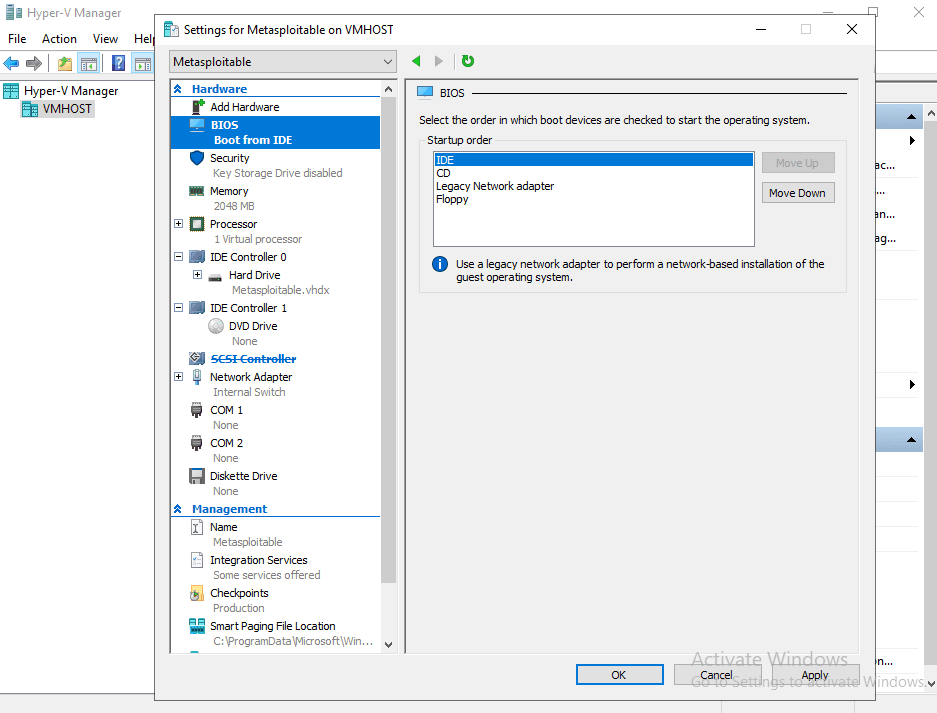
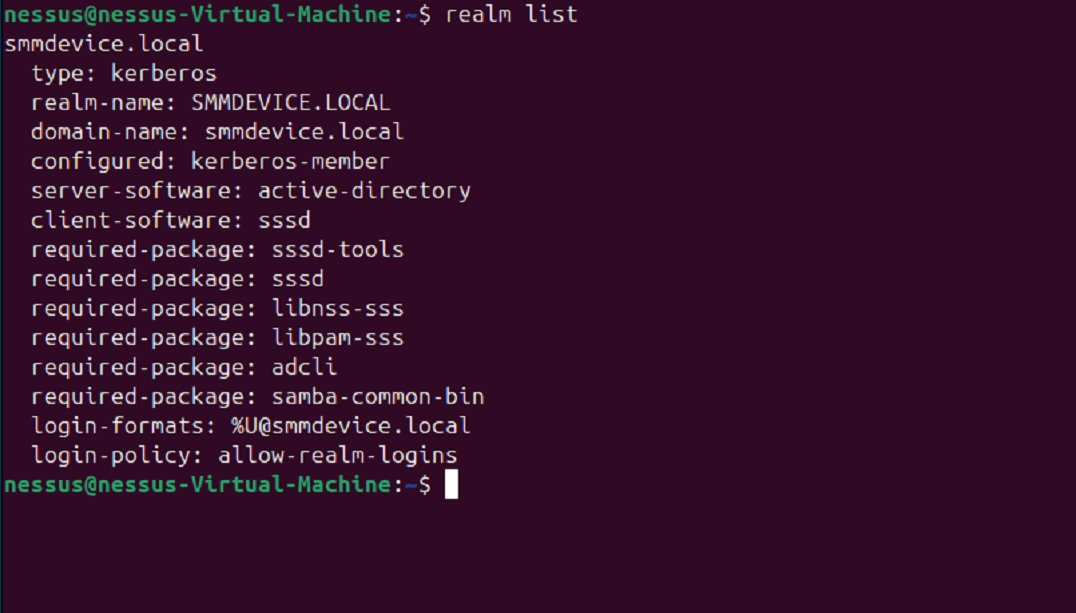
Vulnerability Management

Vulnerability Management

Vulnerability Management

_________________

"The only real security that a man can have in this world is a reserve of knowledge, experience, and ability."
— Henry Ford

"The only real security that a man can have in this world is a reserve of knowledge, experience, and ability."
— Henry Ford

"The only real security that a man can have in this world is a reserve of knowledge, experience, and ability."
— Henry Ford

  • Project Introduction: Vulnerability Detection, Exploitation, and Risk Mitigation in a Controlled Environment

  • Project Introduction: Vulnerability Detection, Exploitation, and Risk Mitigation in a Controlled Environment

This project focuses on the proactive identification, exploitation testing, and remediation of critical vulnerabilities in a hybrid homelab environment. By leveraging security assessment tools like Nessus and a deliberately vulnerable Metasploitable VM, we'll be simulating real-world cybersecurity threats to evaluate risk exposure and strengthen defensive measures.


The vulnerability management lifecycle follows discovery, verification, exploitation, and remediation to assess the practical impact of security flaws. High-priority vulnerabilities such as unauthenticated remote shells, insecure VNC configurations, and SSH key exposure were verified through controlled penetration testing techniques and mitigated accordingly.


Additionally, this project emphasizes the importance of hybrid cloud security, integrating domain-joined resources within an internal network while ensuring attack surface reduction across interconnected virtualized environments. Through continuous assessment and remediation, we'll be showcasing a structured approach to threat detection, response, and security hardening within an enterprise-like setting.

  1. Environment Setup

The Metasploitable 2 virtual machine image is available from Rapid7, the original developers of the platform. However, the distributed image is provided in .vmx format, which is designed for VMwar and is not directly compatible with Hyper-V.


To resolve this, we’ll use StarWind V2V Converter, a free utility that allows for conversion of virtual disk formats, enabling us to convert the .vmx file to a .vhdx format suitable for use in Hyper-V Manager.

Next, we'll create the VM. We'll create a Gen 1 VM to deploy the newly converted disk image named "Metasploitable" with:


  • 2gb of RAM

  • 120gb of Disk space

  • Network: Internal Switch (10.0.0.0/28)

Next, we'll create the VM. We'll create a Gen 1 VM to deploy the newly converted disk image named "Metasploitable" with:


  • 2gb of RAM

  • 120gb of Disk space

  • Network: Internal Switch (10.0.0.0/28)

After creating the VM, we'll need to configure a few settings. We'll open the properties of the Metasploitable VM and begin configuring the VM to boot from the IDE controller, disabling Secure Boot, and we'll remove the SCSI controller to avoid potential boot conflicts

After creating the VM, we'll need to configure a few settings. We'll open the properties of the Metasploitable VM and begin configuring the VM to boot from the IDE controller, disabling Secure Boot, and we'll remove the SCSI controller to avoid potential boot conflicts

We'll now boot and log onto the Metasploitable machine to confirm the installation was a success.

We'll now boot and log onto the Metasploitable machine to confirm the installation was a success.

We'll now need to begin deploying an additional VM named "NessusScanner" to function as the VM performing the scanning across the internal network. This was a Gen2 VM with:

  • Memory: 2gb

  • Disk space: 127gb

  • Networking: Internal Switch (10.0.0.0/28)

We'll now need to begin deploying an additional VM named "NessusScanner" to function as the VM performing the scanning across the internal network. This was a Gen2 VM with:

  • Memory: 2gb

  • Disk space: 127gb

  • Networking: Internal Switch (10.0.0.0/28)

As with our previously created VM, we'll need to also configure the VM settings for our NessusScanner. We'll disable Secure boot, and allocate 4 vCPUs to the machine to handle scanning load.


We'll then boot the machine and run the apt commands to update the system and package manager

  • sudo apt update && sudo apt upgrade

We'll now add the Nessus VM into our local domain. To begin, we'll install the prerequisite packages from apt; realmd, and adcli.

We'll now add the Nessus VM into our local domain. To begin, we'll install the prerequisite packages from apt; realmd, and adcli.

After installing, we'll run realm discover and realm join to join the VM to the domain

After installing, we'll run realm discover and realm join to join the VM to the domain

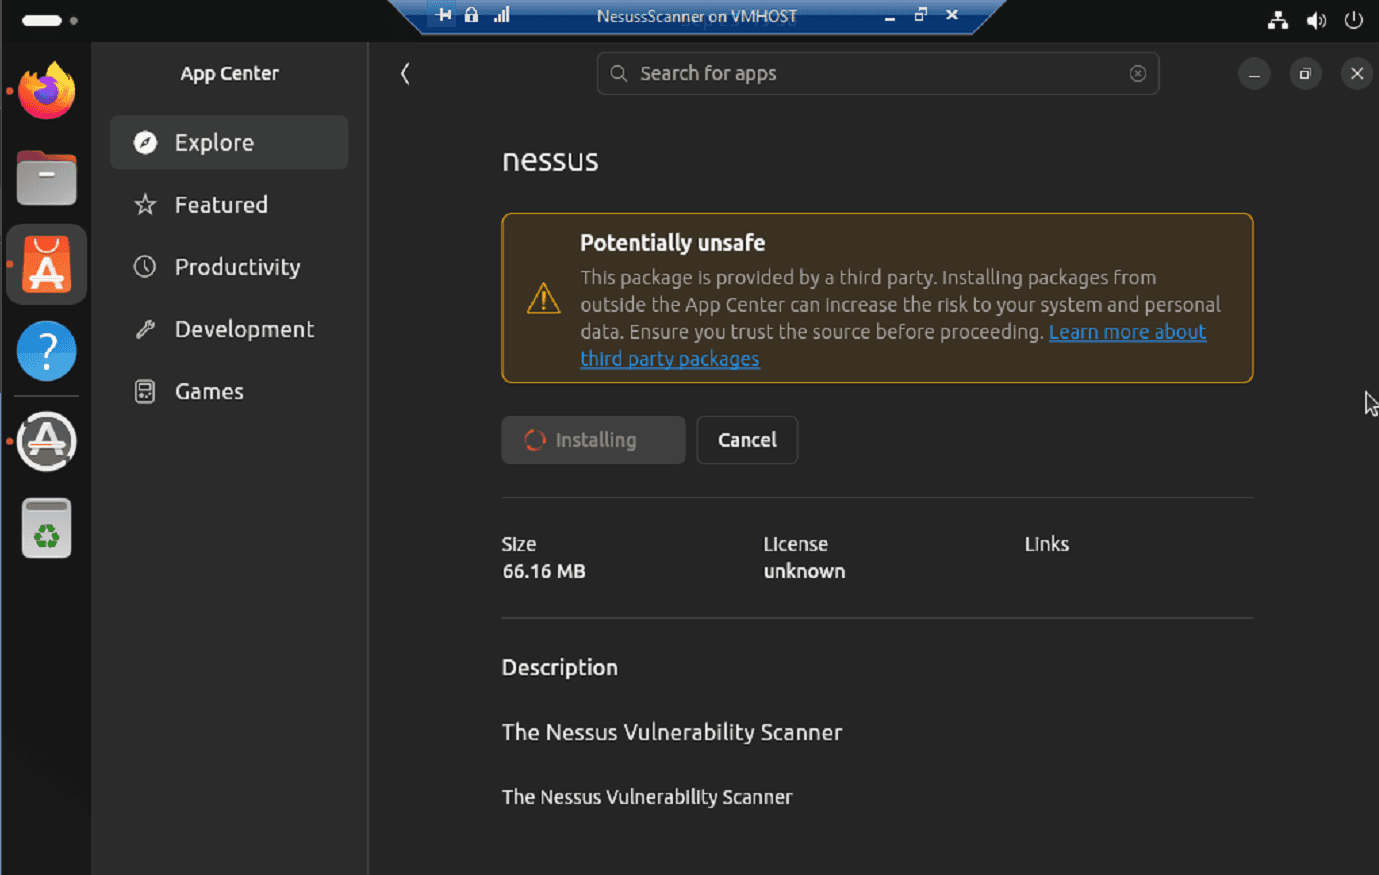
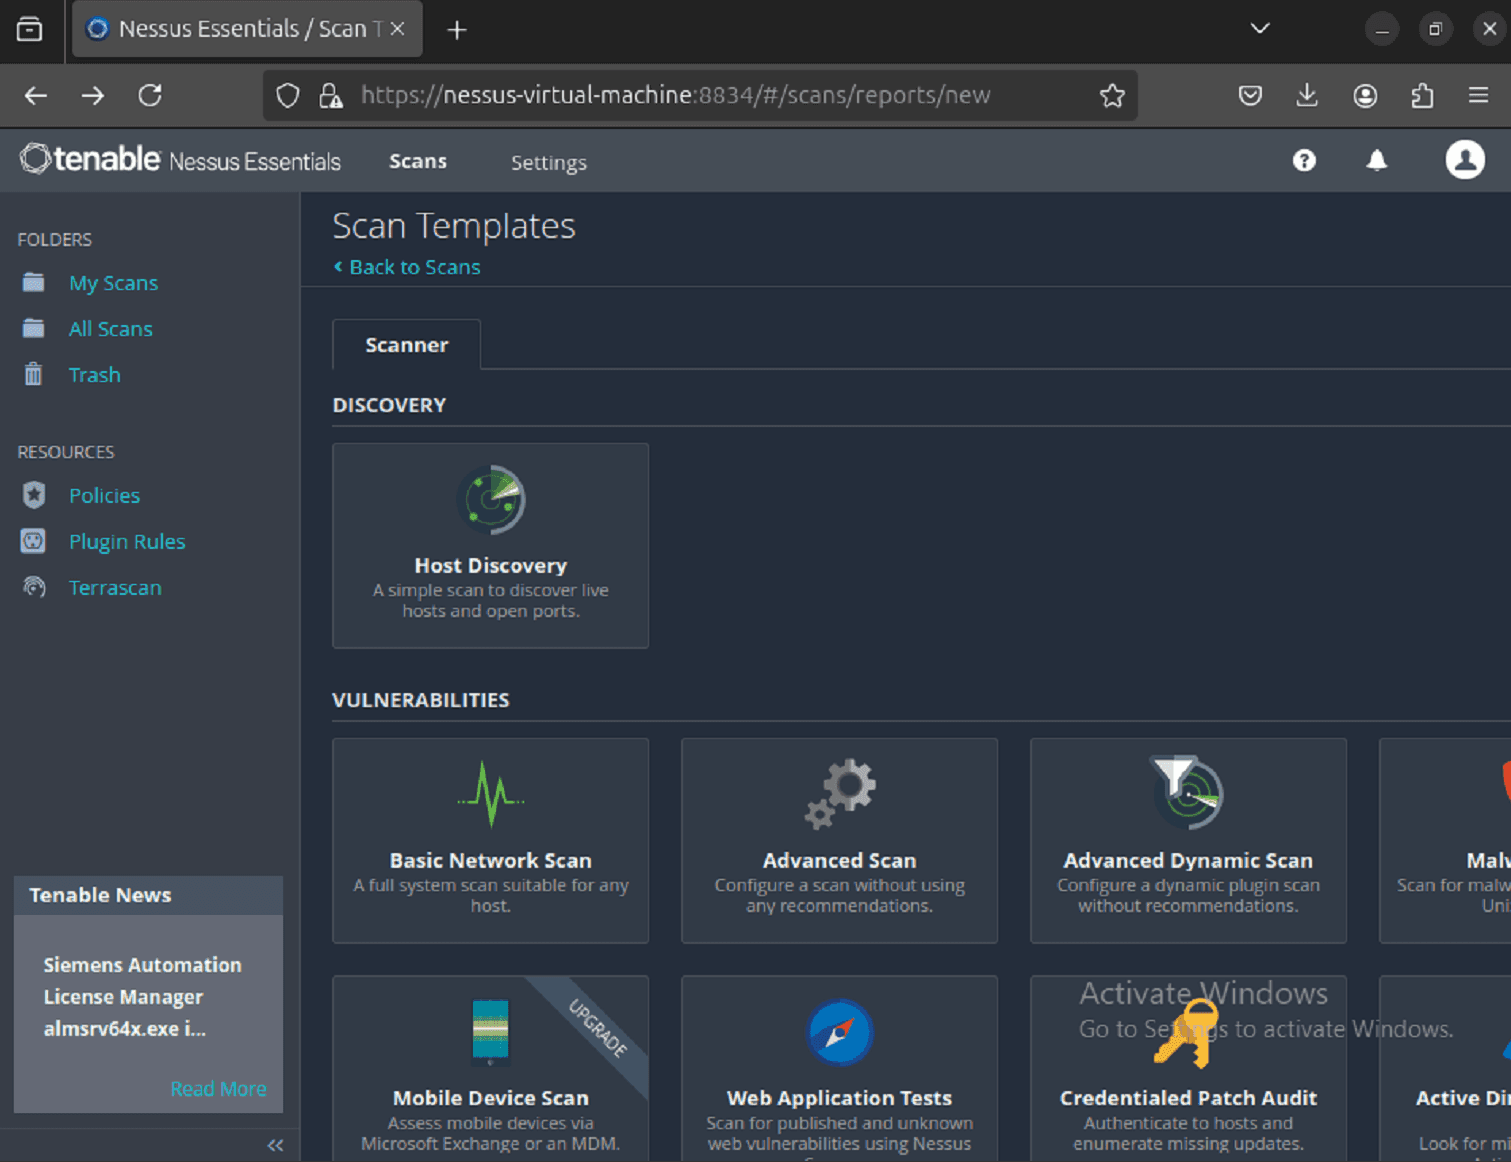
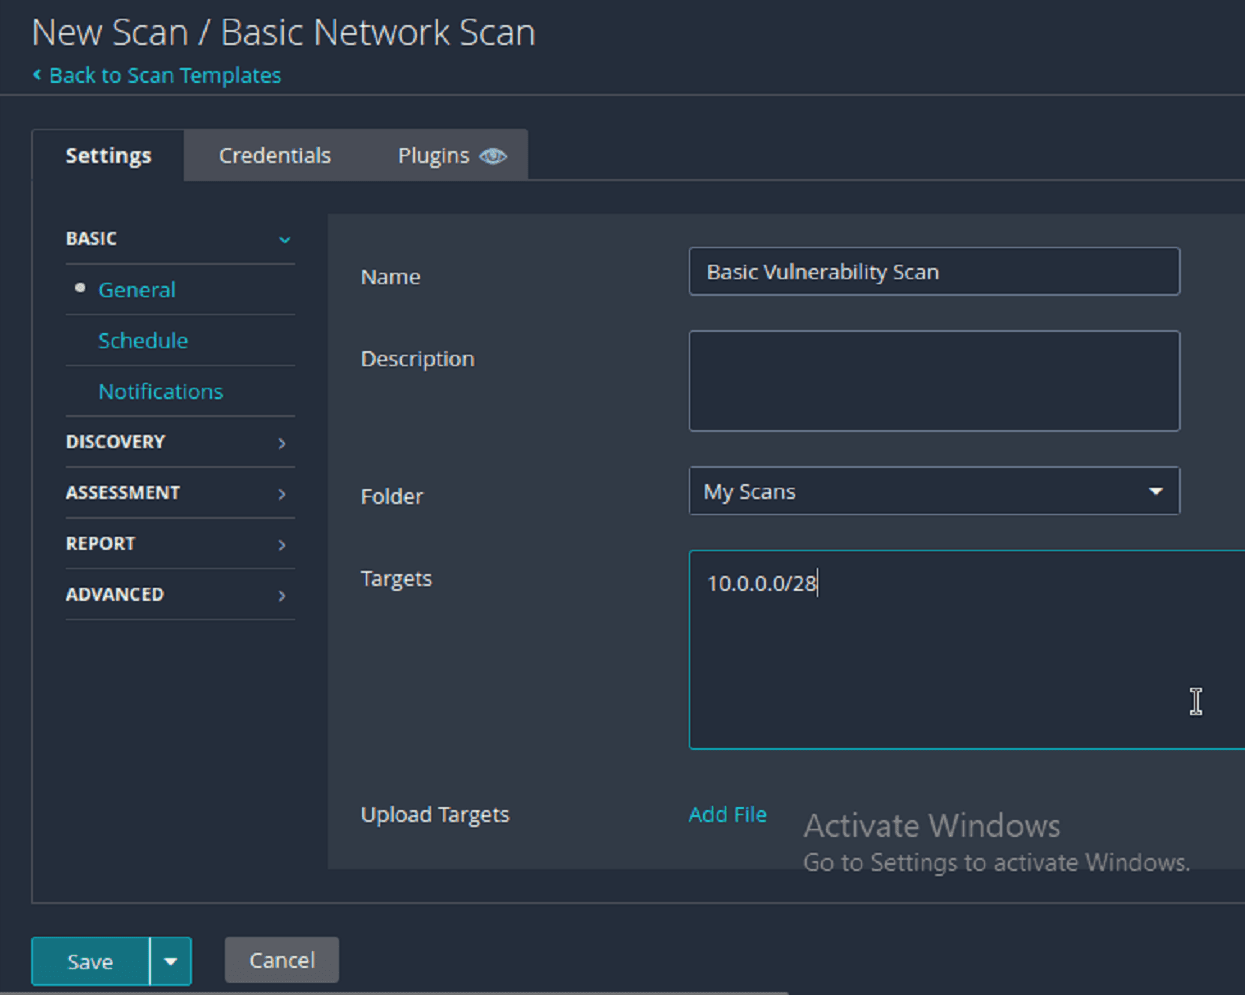
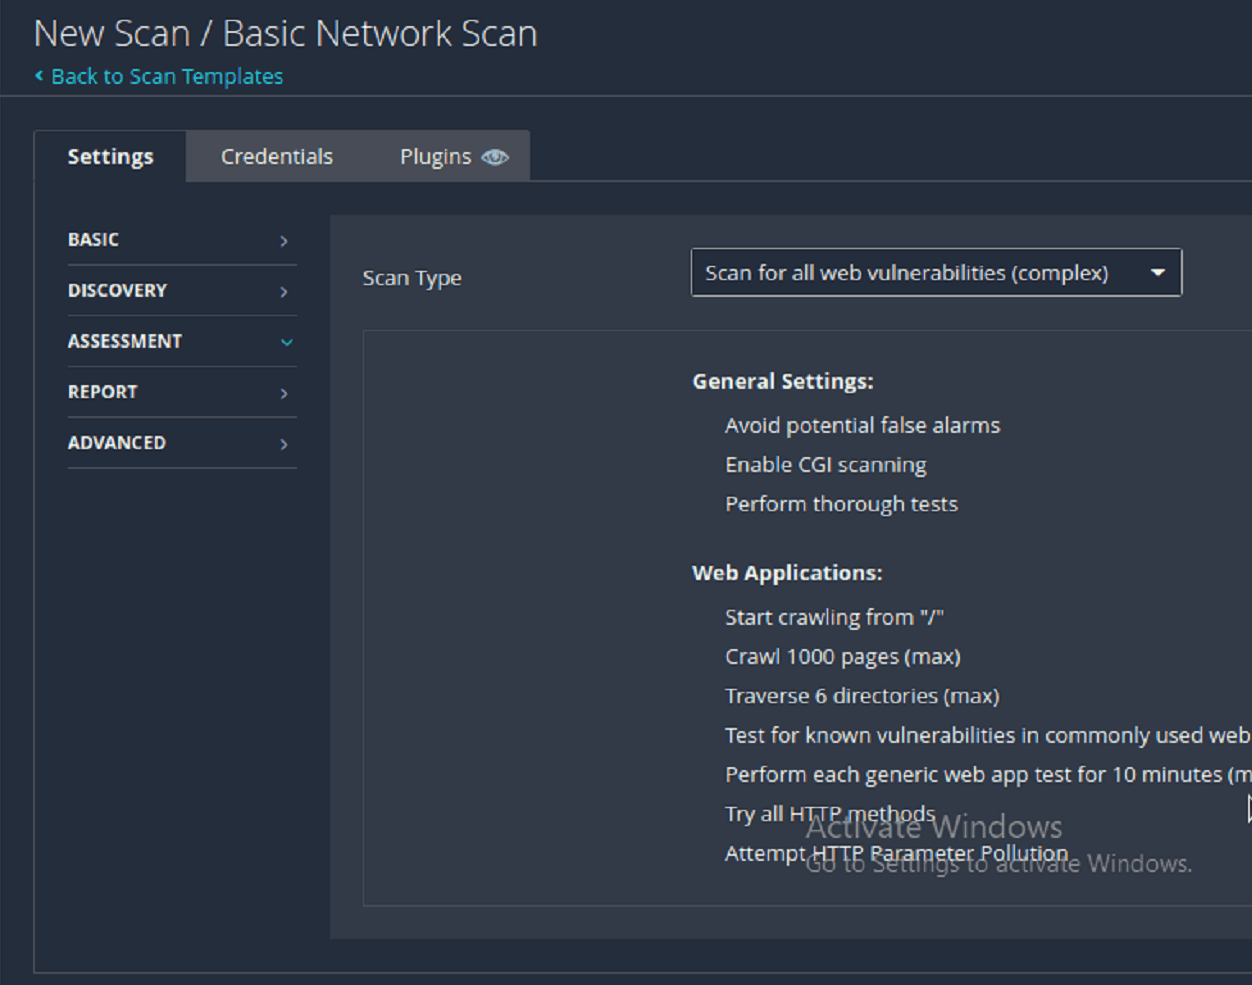
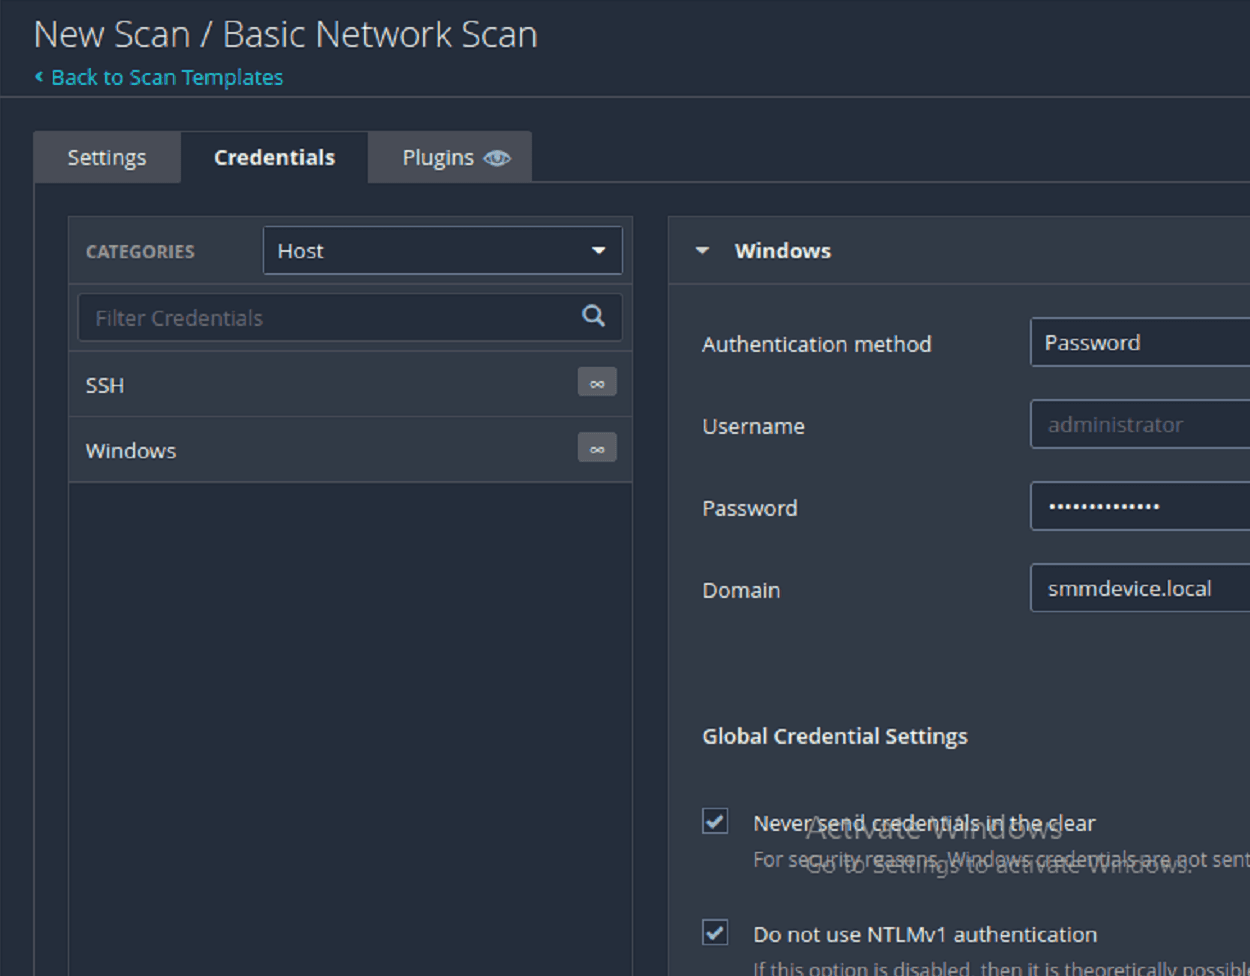
II. Nessus Installation & Initial Vulnerability Scan

Now that we are domain-joined, we'll access www.tenable.com and create an account to receive an activation code for Nessus Manager. After which, we'll begin by installing the Nessus Manager package file

Now that we are domain-joined, we'll access www.tenable.com and create an account to receive an activation code for Nessus Manager. After which, we'll begin by installing the Nessus Manager package file

After the package manager file is complete, we'll open terminal and begin installing the hostname dependency, then install the Nessus package.

After the package manager file is complete, we'll open terminal and begin installing the hostname dependency, then install the Nessus package.

After installation, we'll logon to the Nessus web interface, register an installation using the previously acquired activation code from Tenable, and allow Nessus to download and install all rqeuired plugins, which provide the scanning logic and vulnerability signatures necessary for identifying security issues

After installation, we'll logon to the Nessus web interface, register an installation using the previously acquired activation code from Tenable, and allow Nessus to download and install all rqeuired plugins, which provide the scanning logic and vulnerability signatures necessary for identifying security issues

Now that the plugin installation was finalized and we are successfully logged onto our Nessus instance, we'll navigate to the Scan Templates menu. From here, we're looking for vulnerabilities that may exist on devices across my internal subnet, so we'll select "Basic Network Scan"

Now that the plugin installation was finalized and we are successfully logged onto our Nessus instance, we'll navigate to the Scan Templates menu. From here, we're looking for vulnerabilities that may exist on devices across my internal subnet, so we'll select "Basic Network Scan"

From the new scan menu we'll name our scan "Basic Credentialed Vulnerability Scan" and as the function suggests, set a target of the subnet for the devices that exist on my internal network. that would be 10.0.0.0/28. It is worth noting that since all the devices exist on the internal smmdevice.local domain, we could scan by the domain name as well.


From the new scan menu we'll name our scan "Basic Credentialed Vulnerability Scan" and as the function suggests, set a target of the subnet for the devices that exist on my internal network. that would be 10.0.0.0/28. It is worth noting that since all the devices exist on the internal smmdevice.local domain, we could scan by the domain name as well.


To ensure full coverage of potential vulnerabilities, we'll set this scan for the following:


  1. Within Discovery: Set scanner to scan all ports, including

    • Well-known ports (0-123)

    • Registered ports (1024-49151)

    • Dynamic/private ports (49152-65535)

  2. We'll also enable scanning for web application vulnerabilities (Metasploitable hosts an Apache server)

Compliance Considerations:


NIST SP 800-53 - This vulnerability scan covers all port ranges and potential entry points as well as for scanning for vulnerabilities within publicly accessible web apps.

Compliance Considerations:


NIST SP 800-53 - This vulnerability scan covers all port ranges and potential entry points as well as for scanning for vulnerabilities within publicly accessible web apps.

To perform a credentialed scan, we'll confiugure Windows authentications by navigating to Credentials in the scan settings, select Windows Authentication, then provide domain credentials

To perform a credentialed scan, we'll confiugure Windows authentications by navigating to Credentials in the scan settings, select Windows Authentication, then provide domain credentials

Compliance Considerations:


NIST SP 800-53 RA-5(1) — Credentialed scanning improves accuracy and allows for assessment of internal system state and configurations.

Compliance Considerations:


NIST SP 800-53 RA-5(1) — Credentialed scanning improves accuracy and allows for assessment of internal system state and configurations.

And we're off!

And we're off!

III. Exploitation and Verification of Critical Vulnerabilities

Scan results are in, and we seem to have some work to do. We'll want to provide a good balance with remediation efforts. Looking to demonstrate depth, without necessarily overwhelming the scope of the project. We will begin prioritizing and remediating only the Critical CVSS vulnerabilities, in order of which priority was given

Scan results are in, and we seem to have some work to do. We'll want to provide a good balance with remediation efforts. Looking to demonstrate depth, without necessarily overwhelming the scope of the project. We will begin prioritizing and remediating only the Critical CVSS vulnerabilities, in order of which priority was given

Vulnerability Name: Bind Shell Backdoor Detection

CVE ID: N/a

CVSS Score: 10 (critical)


Discovered On: Metasploitable VM running in hypothetical Prod-environment


Description: The bind shell backdoor represents an immediate and direct potential compromise to the system, allowing an attacker to directly connect and control the system without authentication


Initial Assessment: This exploit indicates that there may be an existing shell on the machine actively listening for connections, providing a potential attacker with direct shell access to the machine, and without authentication measures, easing the difficulty of exploitation and widening the attack surface by providing a simple to exploit vector in the network

Verification Steps taken:


  1. Utilizing the Nessus VM, we'll first install nmap from the terminal

Verification Steps taken:


  1. Utilizing the Nessus VM, we'll first install nmap from the terminal

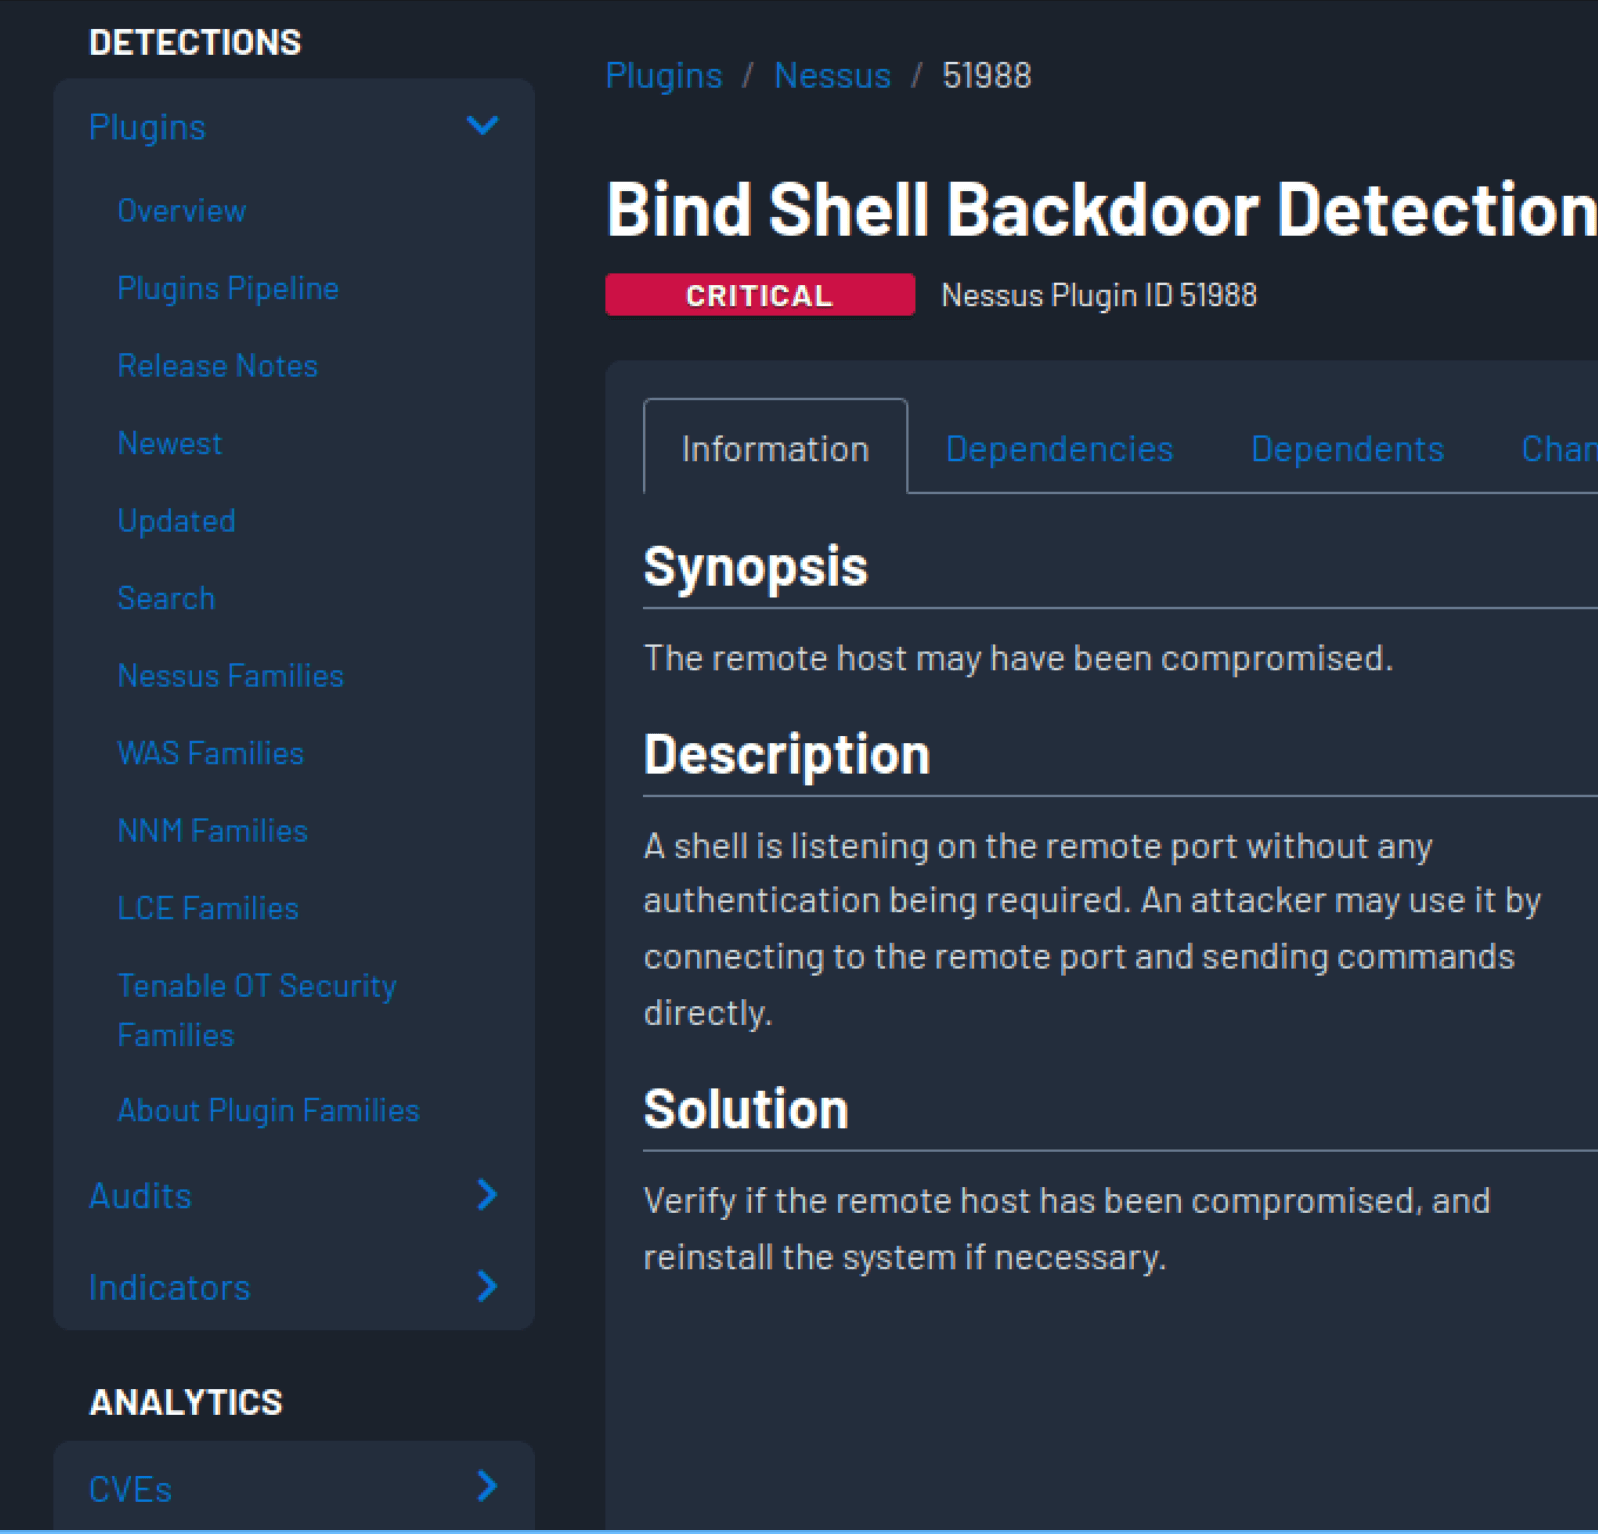
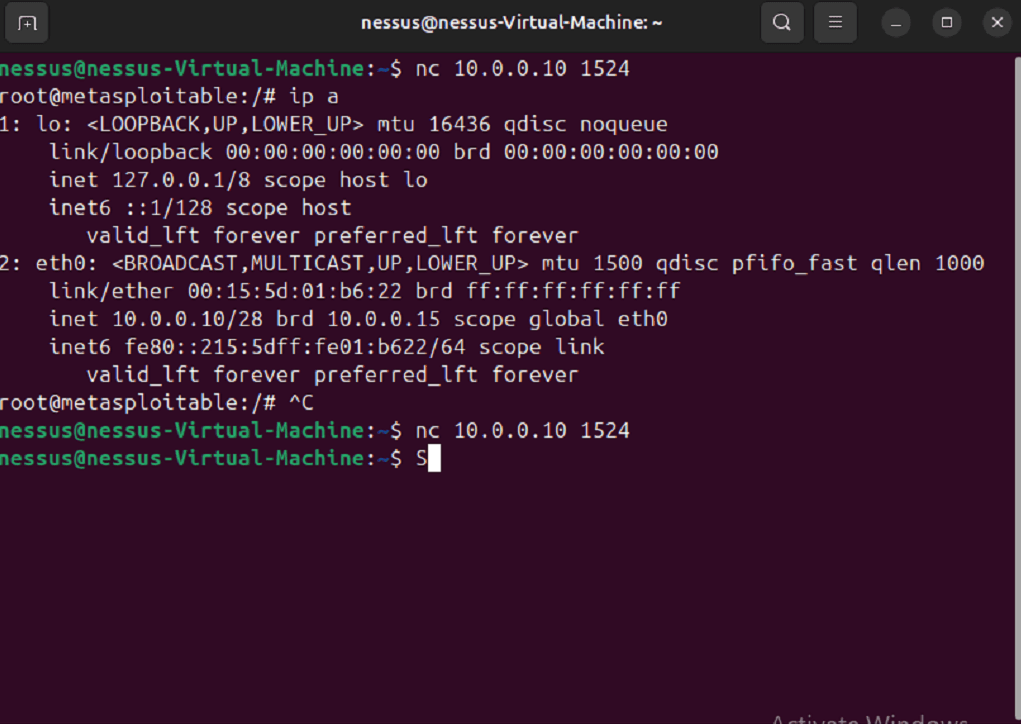
  1. After running the nmap scan, I noticed several services in use that are now considered insecure, primarily because of the plaintext exchange of credentials or commands. However, keeping consistent with the priority to close the bindshell that Nessus detected, we can move on for the moment and we'll notice that Metasploitable has a root shell open on port 1524/tcp

We can exploit this vulnerability ourselves to see how an adversary might by using netcat. Utilized nc 10.0.0.10 1524 to access the shell of the machine over port 1524

We can exploit this vulnerability ourselves to see how an adversary might by using netcat. Utilized nc 10.0.0.10 1524 to access the shell of the machine over port 1524

Compliance Considerations:


NIST SP 800-115 (Technical Guide to Information Security Testing and Assessment) recommends simulating real-world attacks during penetration testing to assess actual risk exposure and validate security control effectiveness.

Compliance Considerations:


NIST SP 800-115 (Technical Guide to Information Security Testing and Assessment) recommends simulating real-world attacks during penetration testing to assess actual risk exposure and validate security control effectiveness.

And sure enough, we're logged in. I then ran 'ip a' to confirm that I have indeed been granted root access to the machine utilizing the bind shell, and found the 10.0.0.10 ip address confirmed within the eth0 interface on the Metasploitable machine

And sure enough, we're logged in. I then ran 'ip a' to confirm that I have indeed been granted root access to the machine utilizing the bind shell, and found the 10.0.0.10 ip address confirmed within the eth0 interface on the Metasploitable machine

Exploitability: Now that we have confirmed that the vulnerability exists, and have exploited it ourselves, we're now also able to confirm that an attacker could gain access through a bind shell and perform any action the compromised system permits. Including the installation of malware, data exfiltration, or creating persistent access on the system once entry was obtained.

Implications: Give that this is such a debilitating vulnerability, we'll want to begin remediation right away. Thankfully, in our hypothetical business environment, the remediation of this specific vulnerability shouldn't provide any user or service interruption, and should be a straightforward fix.

Remediation Plan:

Remediation Plan:

Firstly, we'll need to identify the running service that is listening for active connections on port 1524. We can do this by using the lsof command.

Firstly, we'll need to identify the running service that is listening for active connections on port 1524. We can do this by using the lsof command.

After looking for all services running on port 1524, we find a few pieces of noteworthy information. Firstly, the service in question that seems to be listening and establishing connections is 'ingreslock' a service that handles lock management for the Ingres database, invoked by xinetd when connections, in this case, are made over port 1524. We can also see a few established connections on ingreslock back to a 10.0.0.9 over local port 5506. This makes sense, as. I'm currently connected to the root shell from the Nessus machine.

After looking for all services running on port 1524, we find a few pieces of noteworthy information. Firstly, the service in question that seems to be listening and establishing connections is 'ingreslock' a service that handles lock management for the Ingres database, invoked by xinetd when connections, in this case, are made over port 1524. We can also see a few established connections on ingreslock back to a 10.0.0.9 over local port 5506. This makes sense, as. I'm currently connected to the root shell from the Nessus machine.

Now that we are aware of the specific service creating the backdoor, we can try and determine where this has been set. Checking the net.conf (under.etc/inetd.conf) we are able to find a line for Ingreslock set to send a bash shell back in response to connections established over port 1542 for the ingreslock service

To resolve, we need to edit the file to not include this line. This will allow us to keep the service running, without exposing the bash shell. We can do this by running sudo nano inetd.conf and proceed to restart the xinetd service to apply changes

To resolve, we need to edit the file to not include this line. This will allow us to keep the service running, without exposing the bash shell. We can do this by running sudo nano inetd.conf and proceed to restart the xinetd service to apply changes

Compliance Considerations:


NIST SP 800-53 SI-10 (Information Input Validation): Supports removal of unauthorized or unnecessary services to reduce the attack surface.

Compliance Considerations:


NIST SP 800-53 SI-10 (Information Input Validation): Supports removal of unauthorized or unnecessary services to reduce the attack surface.

After restarting and returning to our Nessus scanner VM, we're able to see that the exploit previously used no longer works to establish a bind shell no longer works whenever attempting connection with VNC.

After restarting and returning to our Nessus scanner VM, we're able to see that the exploit previously used no longer works to establish a bind shell no longer works whenever attempting connection with VNC.

To confirm that the bind shell vulnerability has been successfully mitigated, we initiate a follow-up vulnerability scan using Nessus. The goal is to verify that port 1524/tcp is no longer exposing a root shell.

Upon completion of the scan, the Bind Shell Backdoor Detection finding is no longer present in the report—validating that the change made to inetd.conf and the restart of xinetd were effective in removing the vulnerability.

Compliance Considerations:


NIST SP 800-53 RA-5 (Vulnerability Scanning): Requires organizations to verify and validate that vulnerabilities have been resolved

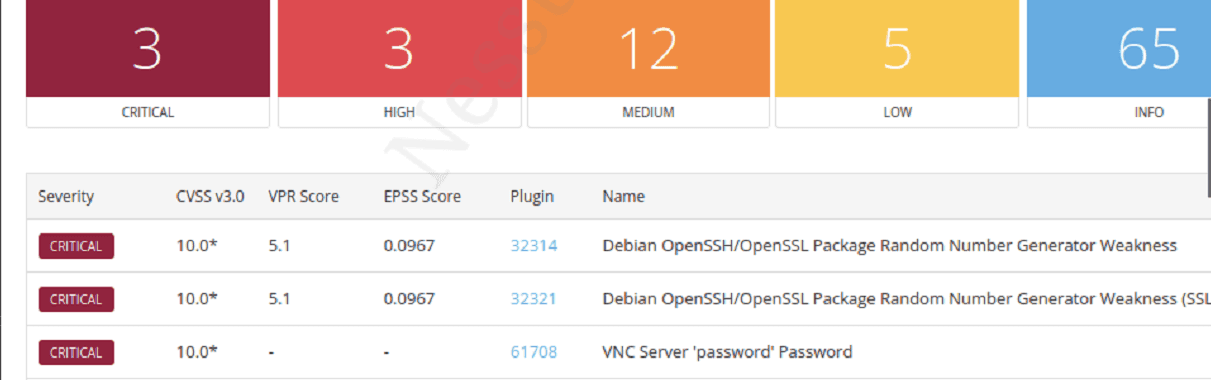
Vulnerability Name: VNC Password is "Password"

CVE ID: N/a

CVSS Score: 10 (critical)


Description: Our Metasploitable machine hosts a VNC service, but it is secured with weak authentication credentials. In this scenario, an attacker could easily gain access to the service, exploiting the vulnerability and gaining a remote shell


Initial Assessment: This vulnerability represents a severe breach in authentication control and highlights the risk ofusing default or weak credentials. The VNC service would be crack would be near-instance and provide unauthorized remote access to the system with a potential for privilege escalation.


Verification Steps taken:


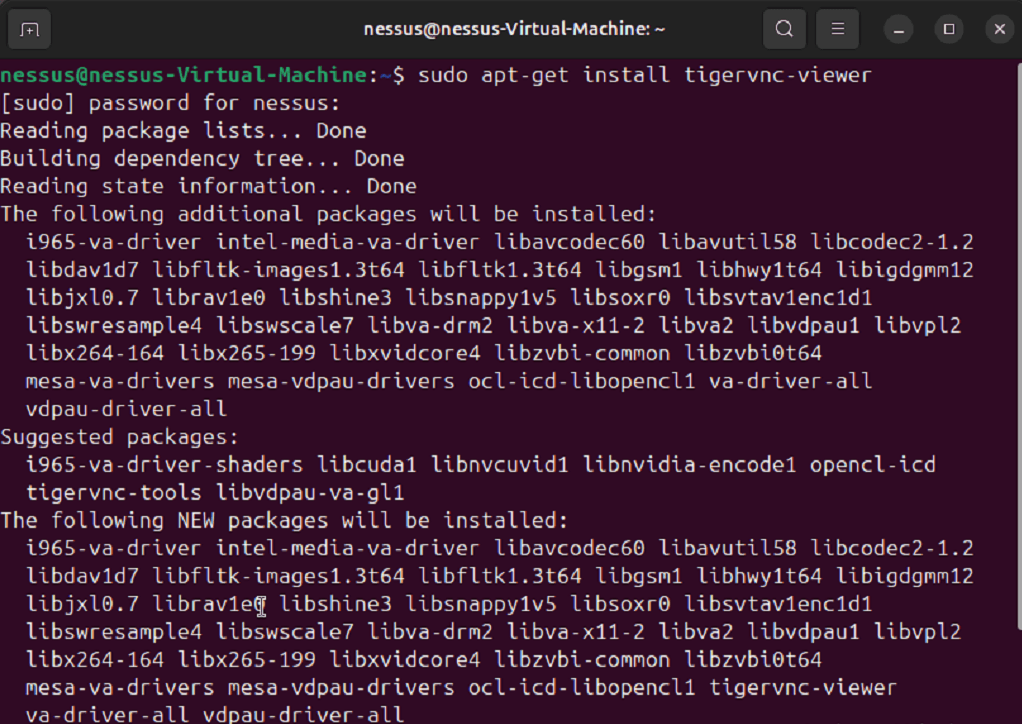
  1. Installed tigervnc-viewer on the Nessus machine

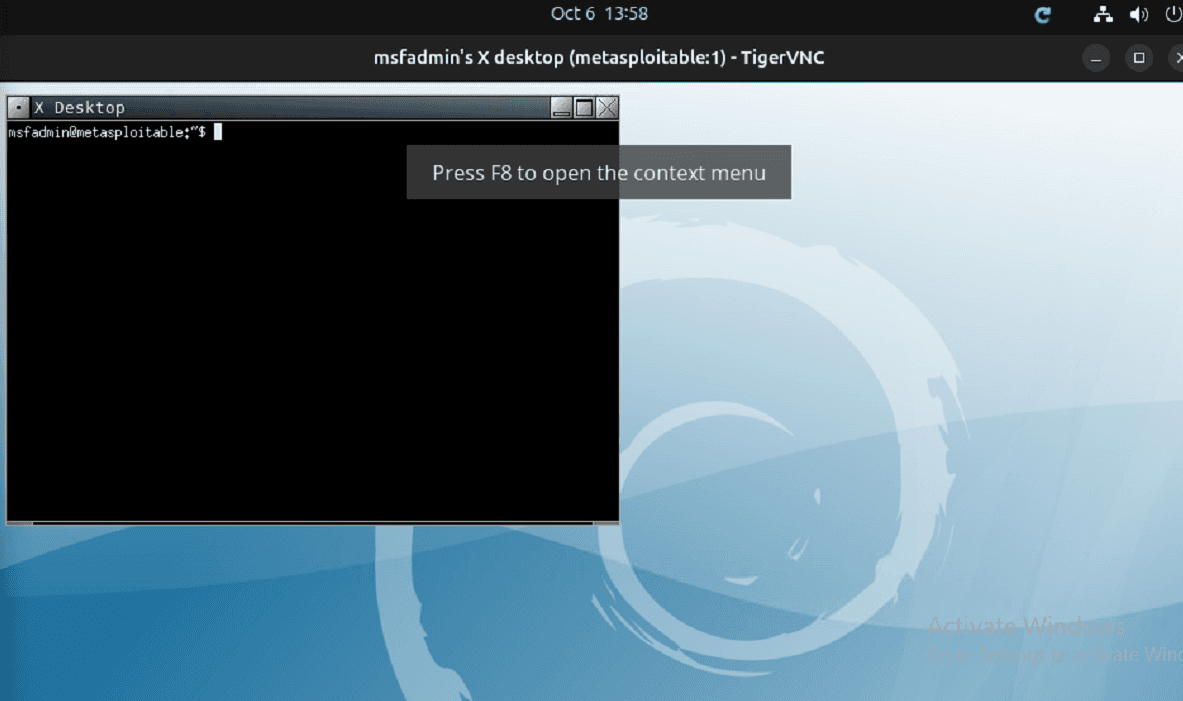
  2. Used vncviewer 10.0.0.10:1 with a password value of 'password' and was able to access the metasploitable machine's desktop through tigervnc

Exploitability: The password is indeed 'password', set by Metasploitable. This is highly exploitable, as an attacker could perform a port sweep to confirm that the service is running, and easily find the password almost instantaneously through simple brute forcing, allowing them to gain a shell for root access to the system.

Exploitability: The password is indeed 'password', set by Metasploitable. This is highly exploitable, as an attacker could perform a port sweep to confirm that the service is running, and easily find the password almost instantaneously through simple brute forcing, allowing them to gain a shell for root access to the system.

Remediation

To begin resolving this, we should just need to change this password from its default. Firstly, from terminal on the Metasploitable machine, we'll run 'vncpasswd' to change the value to a password with higher complexity

To begin resolving this, we should just need to change this password from its default. Firstly, from terminal on the Metasploitable machine, we'll run 'vncpasswd' to change the value to a password with higher complexity

Compliance Considerations:


NIST SP 800-53 AC-2 (Account Management): strengthening authentication mechanisms and eliminating default credentials.

We'll then restart the VNC server

We'll then restart the VNC server

After updating the VNC server password and restarting the service, from the scanning machine we'll attempt to reconnect to the Metasploitable host. When prompted, we'll enter the previous default password. The subsequent connection attempt fails with an authentication error confirming that the password update was successful and the weak default credential is no longer valid

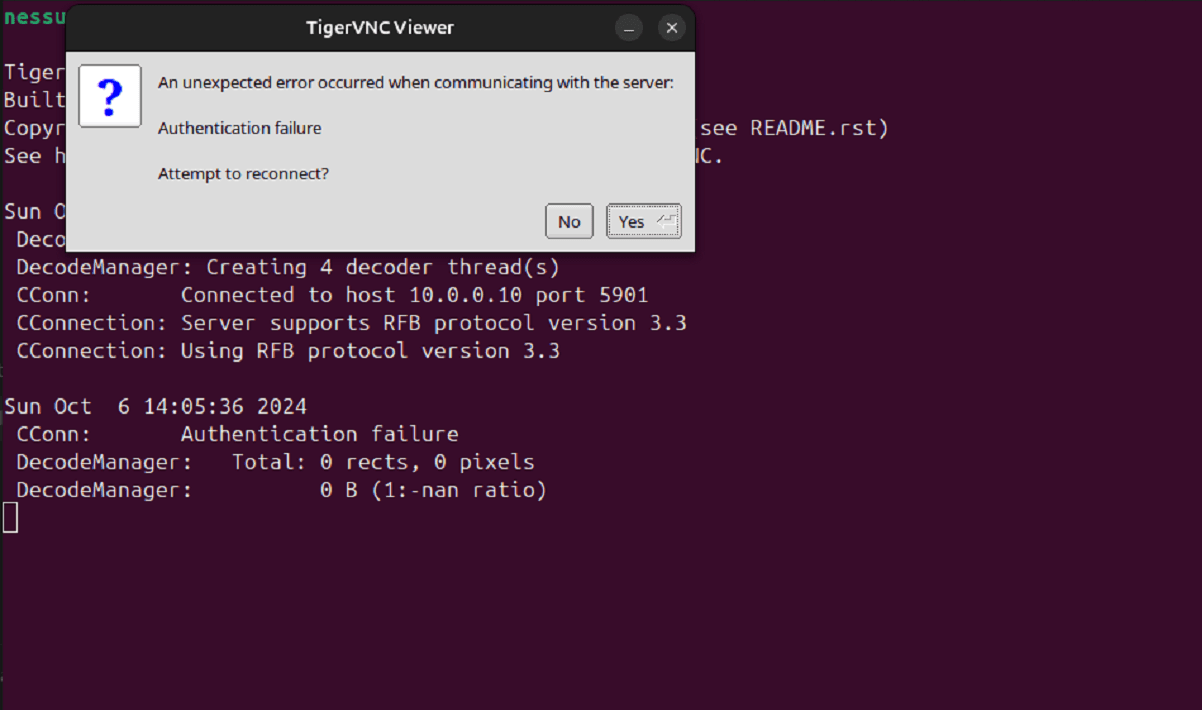
Although the VNC authentication failure confirmed that the default password had been changed, the vulnerability still appeared in the subsequent Nessus scan.

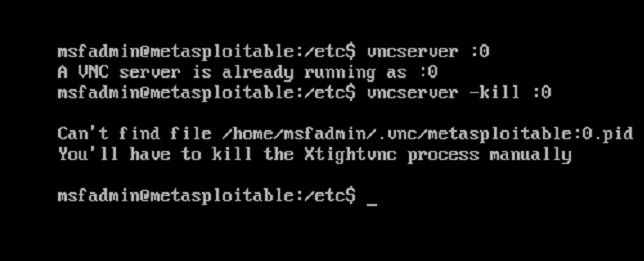
To investigate furtherl we'll return to the Metasploitable VM and attempt to reinitialize the VNC server using:

The output indicated that display :0 was already active, suggesting that an existing VNC session—possibly still using the old credentials—was running in the background and contributing to the continued detection of the vulnerability.


After confirming that display :0 was still active, the next step was to shut down the running VNC server instance:

However, metasploitable returned an error stating that the .pid file could not be found, indicating that the session could not be cleanly terminated using the standard method.


This suggests that either the VNC session was improperly initialized or a startup script was interfering with the way we'd normally kill this service.

Compliance Considerations: 

This scenario highlights the importance of proper service lifecycle controls as addressed in:


 NIST SP 800-53 CM-5 (Access Restrictions for Change): Ensuring administrators can reliably terminate or restart services when applying security updates.

I first attempted to kill the xtightvnc service by identifying its process ID with ps aux | grep "xtightvnc" and killed the corresponding PID. However, every time I would kill the service, it would restart itself, finding another entry each time running ps under a different PID.


First, I checked the init.d directory for a startup/logon script that could enable this, though that did not turn up any clues.


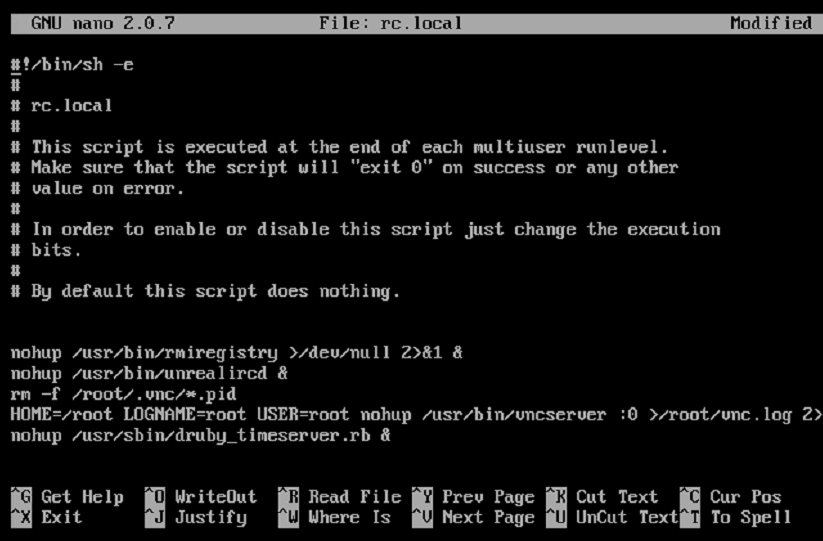
So I then redirected my attention to /etc/rc.local to attempt to find scripts that ran during startup, and it was there that I found my answer.


It seems that there is an added line to remove the .pid files within the .vnc directory. This would be the reason behind why I was unable to find the correct display in order to apply changes needed to the password. I began by commenting this line out of rc.local

Compliance Considerations:


NIST SP 800-53 CM-6 (Configuration Settings): Uncovering and correcting unauthorized or undocumented startup behavior that could obstruct system management and remediation efforts.

Without the PID, the process will have to be identified and killed manually. Ran 'ps aux | grep xtightvnc' but was met with no results. Further, searched for ps aux | grep vnc instead and received the following output. In that which, I can see that there are two processes shown. Te first seems to be the xtightvnc process associated with running display 0, while the second seems to be a startup script that could setup the desktop environment and any initial programs or settings for the session. In this case, we'll need to kill the first listed.

I was able to kill the associated process by PID with 'sudo kill 5511', and verified that the server was not running by simply restarting and killing the display that showed up to ensure that the vncserver kill command was successful.

I then recreated the display 0, and logged back onto the Nessus machine to test that the new password was required in order to connect, and I could see that 'password' was no longer accepted. Concluded remediation by closing the VNC session and rerunning the vulnerability scan to ensure that the vulnerability was no longer present.


After running the Nessus scan once again, we can see that the VNC password vulnerability is no longer present.

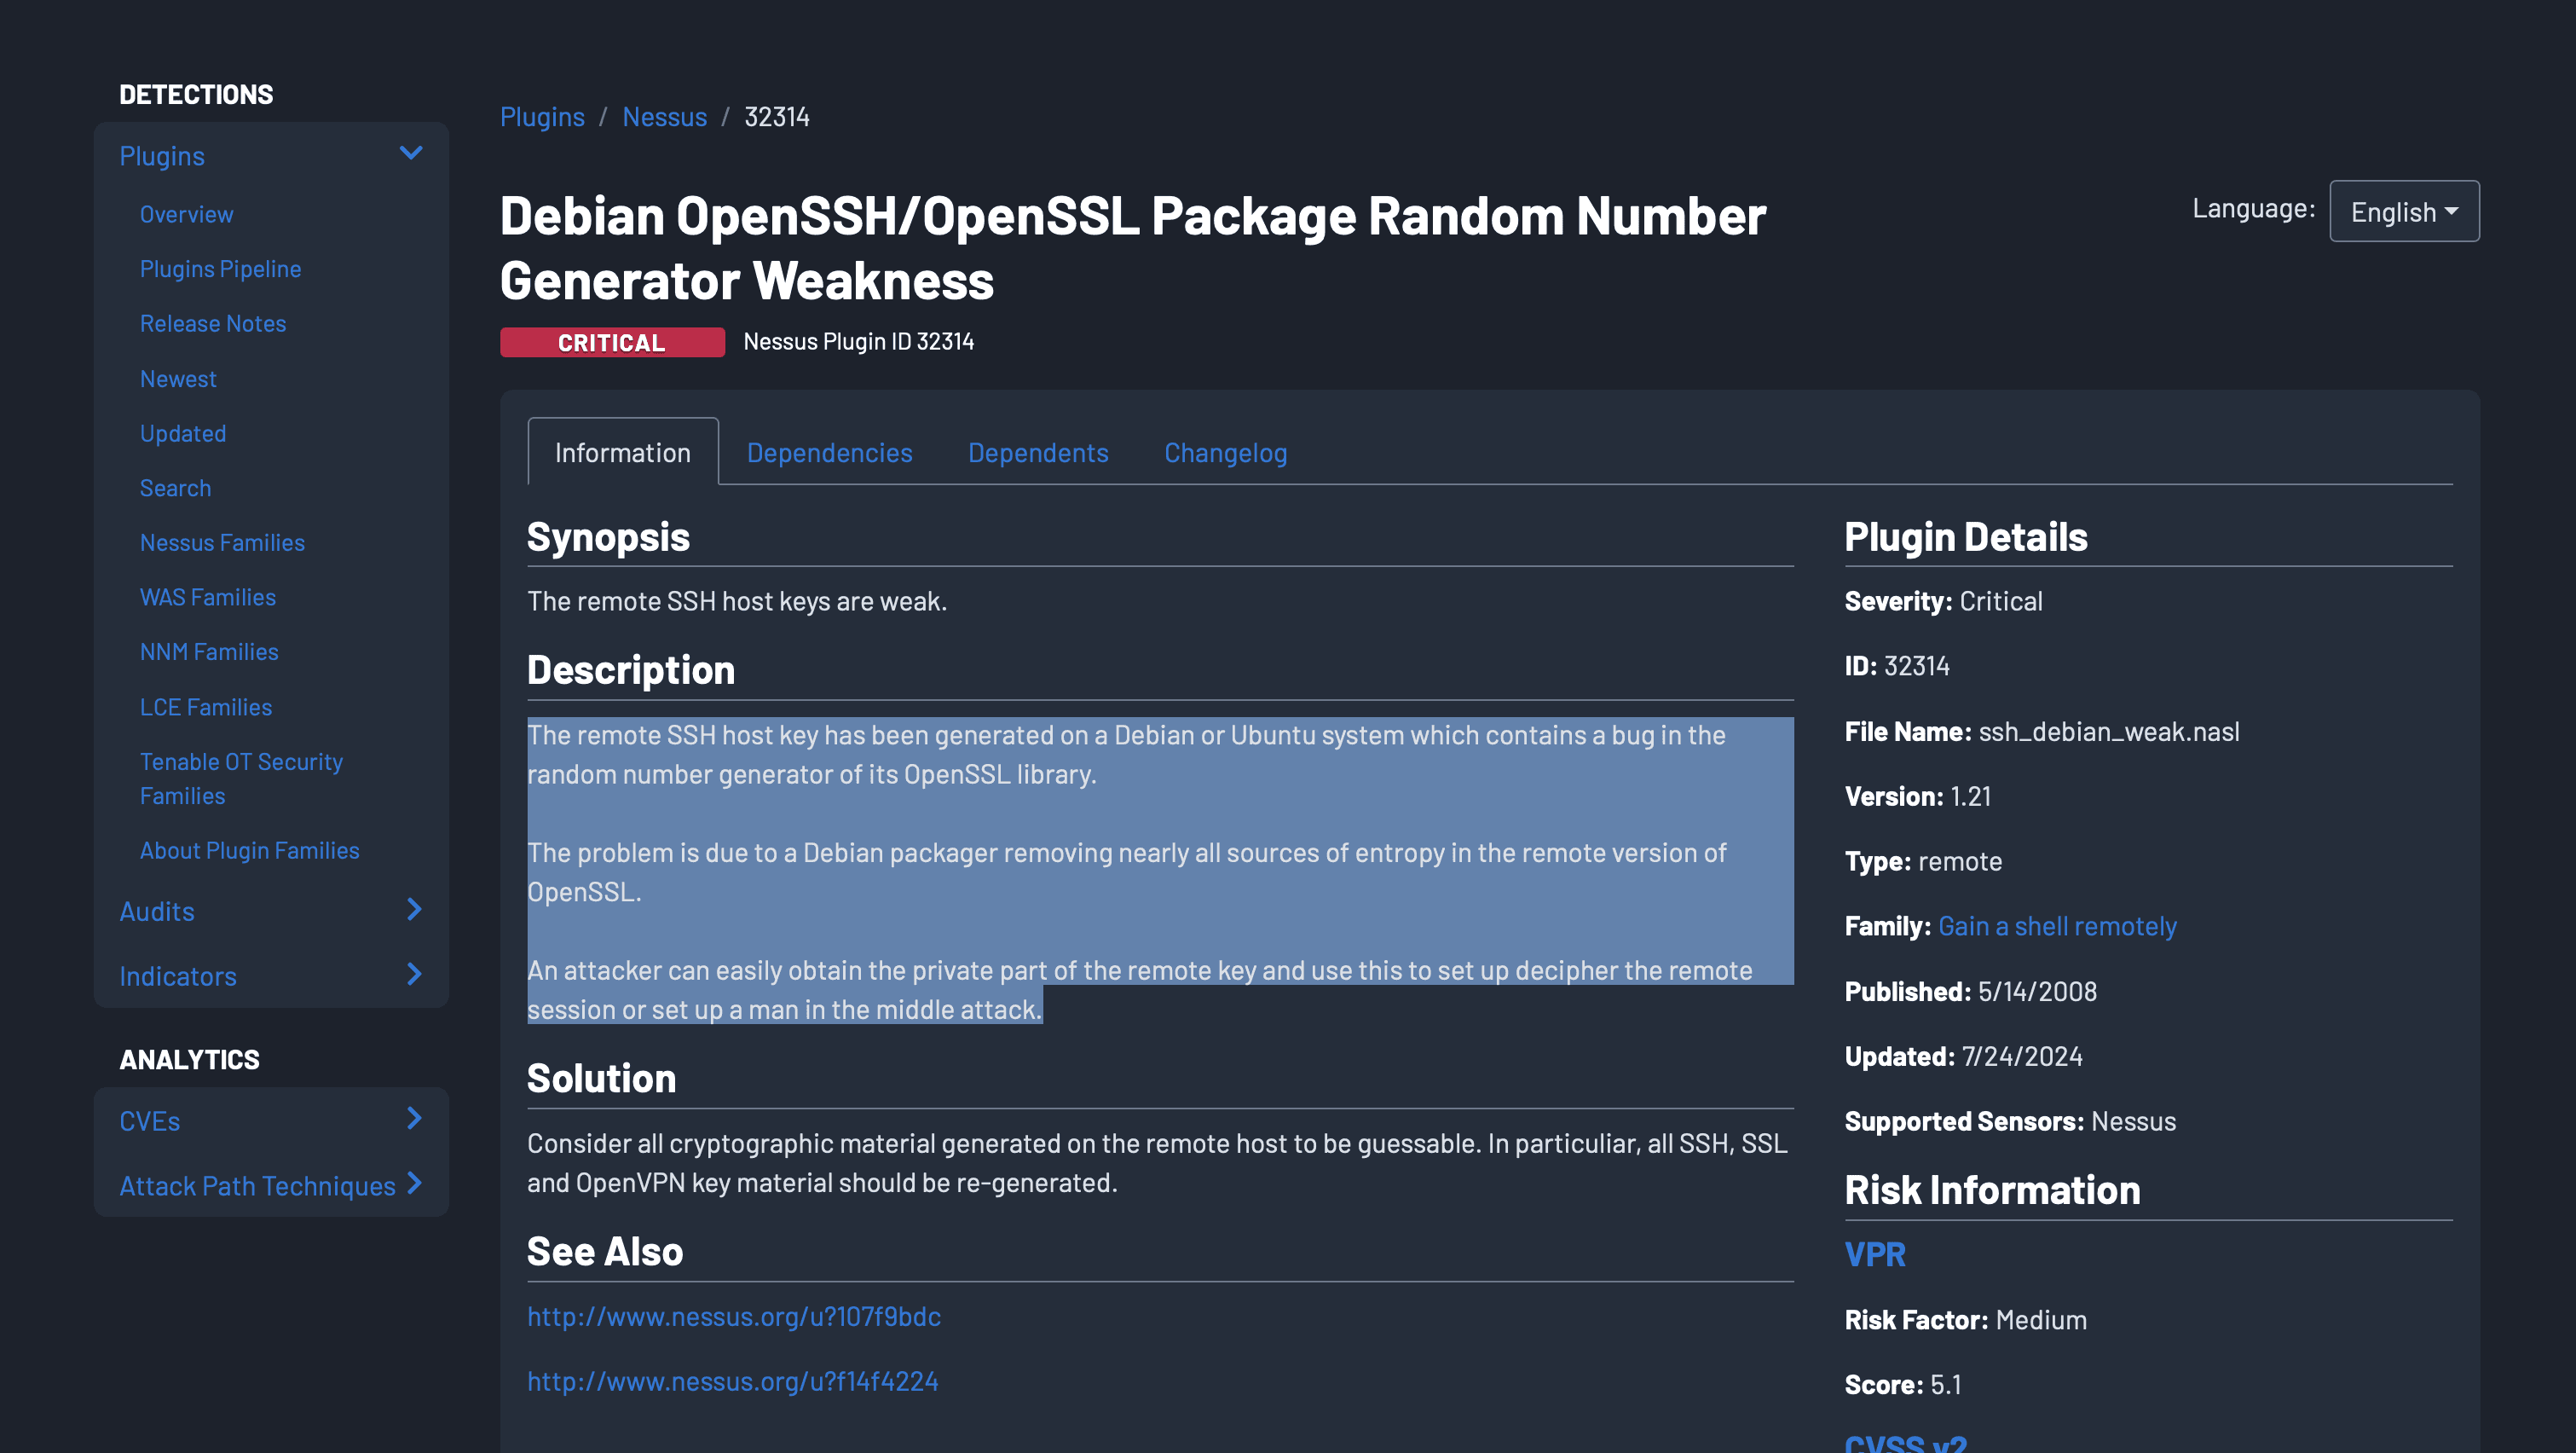
Vulnerability Name: Debian OpenSSH/OpenSSL Package Random Number Generator Weakness

CVE ID: N/a

CVSS Score: 10 (critical)


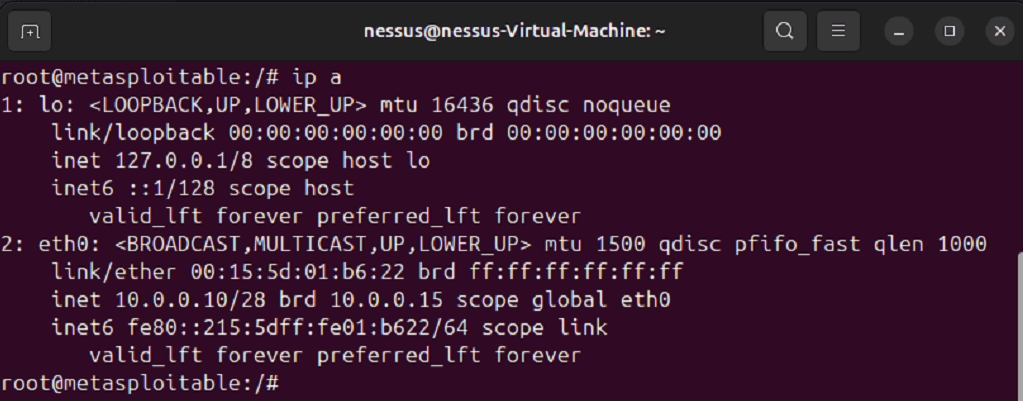
Discovered On: Metasploitable2 VM (10.0.0.10/28)


Description: Nessus has detected a bug in the random number generation resulting in a remote SSH key that an attacker could obtain the private part the the hotkey to decipher a remote session. This could result in the attacker gaining a remote shell, or setting up a On-path attack.

Initial Assessment: The vulnerability identified in this scenario is related to a well-documented flaw in Debian’s implementation of OpenSSL, in which a bug in the RNG results in predictable SSH key pairs.


This affects systems like Metasploitable2 that use the vulnerable Debian-based OpenSSH/OpenSSL package set.

Nessus has flagged this as a critical vulnerability, scoring 10.0 on the CVSS scale, due to its high exploitability and impact. An attacker with access to the network could use publicly available tools to generate the entire key space affected by the weak RNG, allowing them to:


  • Derive the private SSH host key.

  • Perform MITM attacks.

  • Decrypt traffic or impersonate the server to clients.

  • Establish remote access by impersonating trusted hosts or injecting themselves into SSH sessions.


This type of vulnerability poses severe risks to system confidentiality and integrity.

Remediation


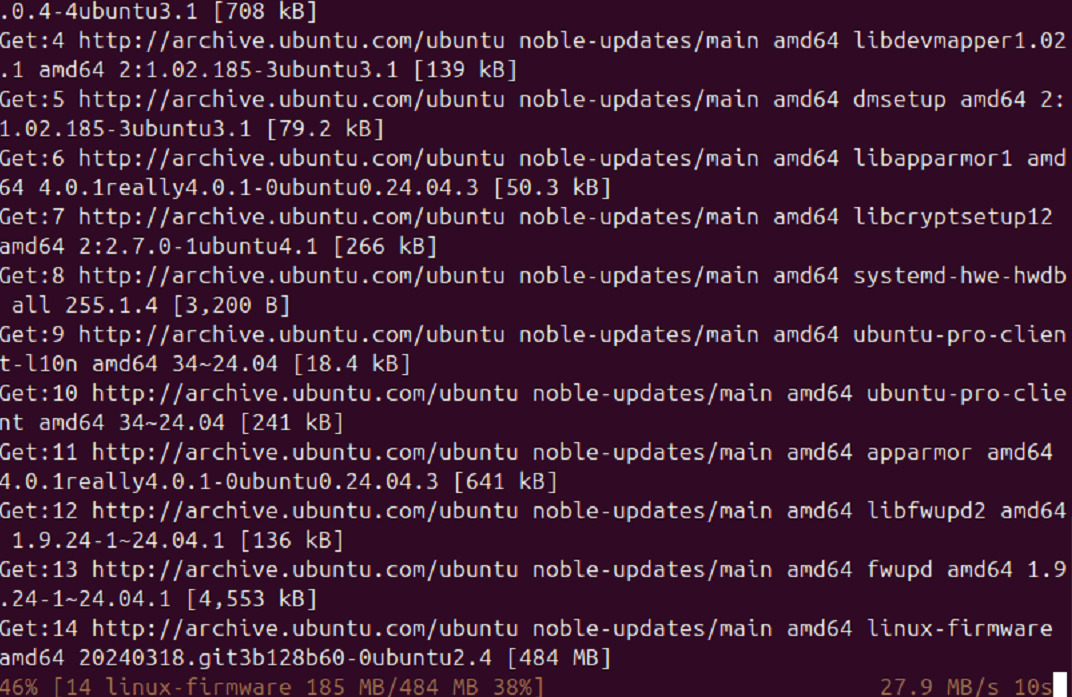
This vulnerability is common with older Debian-based distributions running SSH as there is a lack of needed entropy when generating the cryptographic keys. Simply regenerating the keys may not be enough if the OpenSSL version isn't patched. To begin, we'll attempt to update the system

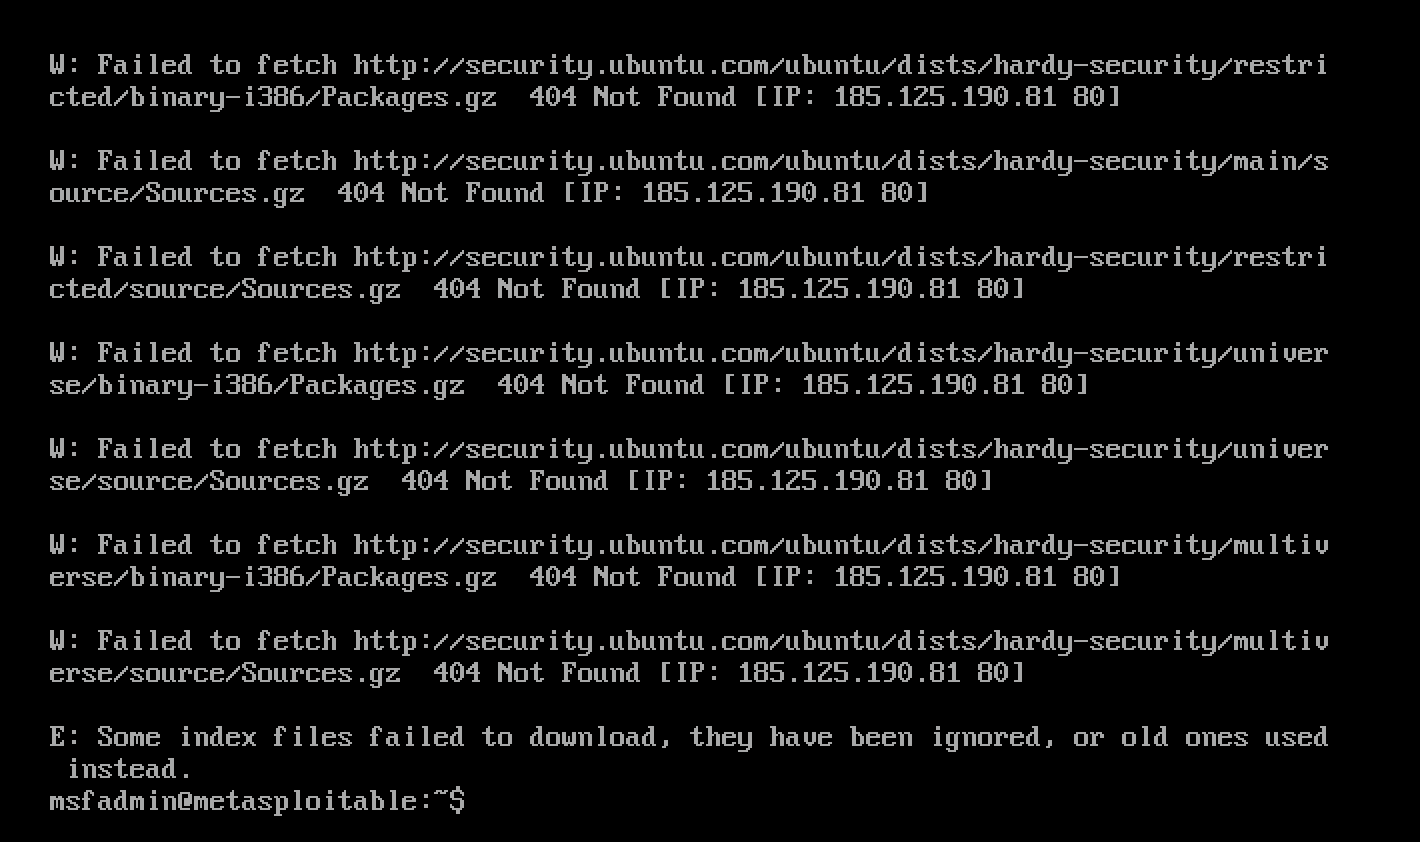
However, what we find instead is that we're unable to fetch the needed update files from

After killing the process, given that the vulnerability specifically mentions issues with the SSH host keys, we'll regenerate those using this command for the RSA and DSA host keys:


  • sudo ssh-keygen -t rsa -f /etc/ssh/ssh_host_rsa_key -N ""

  • sudo ssh-keygen -t isa -f /etc/ssh/ssh_host_dsa_key _N ""


Where in:


  • -t represents the key type

  • -f represents the file name and location for the new keys

  • -N "" represents an empty passphrase

Compliance Considerations:

NIST SP 800-53 SC-12 (Cryptographic Key Management) - reestablishing the cryptographic integrity of the system using secure, non-predictable key material

Conclusion

Upon further scanning, this shows as being still present. This is because despite the keys being regenerated, the crypography is simply too vulnerable to resolve. This theoretically could be resolved by updating to a later, more secure version of SSH, but Metasploitable is not able to reach modern repositories (or even the older repositories at old-releases.ubuntu.com) to undergo that task. However, key regeneration, coupled with an update, would normally resolve this issue. However here it proves to be a bit of an "unpatchable problem child"


Outside of this particular vulnerability however, all of our criticals with high CVSS scores are resolved! I hope this project comes of some use to those who may read, as it was super interesting to work on, and Tenable was a great platform to learn within to garner hands-on vulnerability scanning experience.