Malware Prevention Alerting & Automated Isolation

Malware Prevention Alerting & Automated Isolation

Malware Prevention Alerting & Automated Isolation

_________________

"The best way to predict the future is to create it."
— Peter Drucker

"The best way to predict the future is to create it."
— Peter Drucker

"The best way to predict the future is to create it."
— Peter Drucker

  • Project Introduction: SOAR Workflow: Detecting and Isolated Malware-Infected Endpoints

This project outlines the implementation of an automated malware detection and response workflow leveraging Elastic Stack, Slack, and Cloudflare Tunnels. The workflow is designed to detect malicious file installations, generate alerts, notify security teams via Slack, and provide an automated response mechanism to isolate compromised endpoints using a Slack slash command.

The system functions as follows:


  • Detection: When a user machine attempts to install a file with a known malware signature, an alert is triggered.


  • Alerting: A Slack message is automatically generated with critical details, such as the hostname, endpoint ID, and file information.


  • Response: The recipient of the Slack message can execute the /isolate command, which will initiate an endpoint isolation process through Kibana.


When a malicious file is detected, Elastic Agent (running with the Elastic Defend integration) enforces the detection rule and logs the event in Kibana. Kibana then triggers a Slack Connector, notifying the security team. If isolation is required, an analyst can execute the /isolate command, which sends an HTTP POST request to a PythonAnywhere-hosted Flask web app. This app parses the request and forwards it through a Cloudflare Tunnel to the Kibana API, which isolates the affected machine based on the Host ID provided in the Slack message.


A logical flow of this process is illustrated below:

  1. Agent Setup & Malware Detection

To initiate the creation of this workflow, we must first ensure that the target machine is enrolled in Fleet and running the Elastic Agent service with an appropriate agent policy.


This policy must include the Elastic Defend EDR integration to enable real-time malware detection and response.

As previously done in similar projects, navigate to Kibana → Integrations, then select Elastic Defend > Add Integration. During configuration, assign the agent policy a clear and identifiable name, such as "Defend", to distinguish it within Fleet.

With the Ubuntu user machine VM successfully enrolled in Fleet and assigned the appropriate Elastic Defend agent policy, we can now test the EDR’s detection capabilities using the EICAR test file, a standard non-malicious file used for verifying antivirus and endpoint security solutions.

To perform this test, navigate to EICAR’s official website from the Ubuntu user machine VM and attempt to download the test file.

Upon selecting the download option on the EICAR test file page, the download automatically fails. This confirms that Elastic Defend’s EDR integration is actively monitoring and blocking files with known malware signatures, effectively preventing execution on the system.

Upon selecting the download option on the EICAR test file page, the download automatically fails. This confirms that Elastic Defend’s EDR integration is actively monitoring and blocking files with known malware signatures, effectively preventing execution on the system.

Now that we have a hit with our Elastic EDR, we can return to our Kibana dashboard and view the alert that was generated by Defend.

Now that we have a hit with our Elastic EDR, we can return to our Kibana dashboard and view the alert that was generated by Defend.

II. Alerting through Kibana and Slack

With successful confirmation that Elastic Defend detects and blocks files with known malware signatures and that these events appear in the Kibana dashboard we can now move to the next step:

configuring Kibana to send automated notifications to Slack. This ensures that security teams receive real-time alerts whenever a malware prevention event occurs.


To begin, we'll navigate to Kibana → Security → Rules → Alerts → Endpoint Security (this is the alert triggered during Malware Prevention) and select Edit Rule Settings.

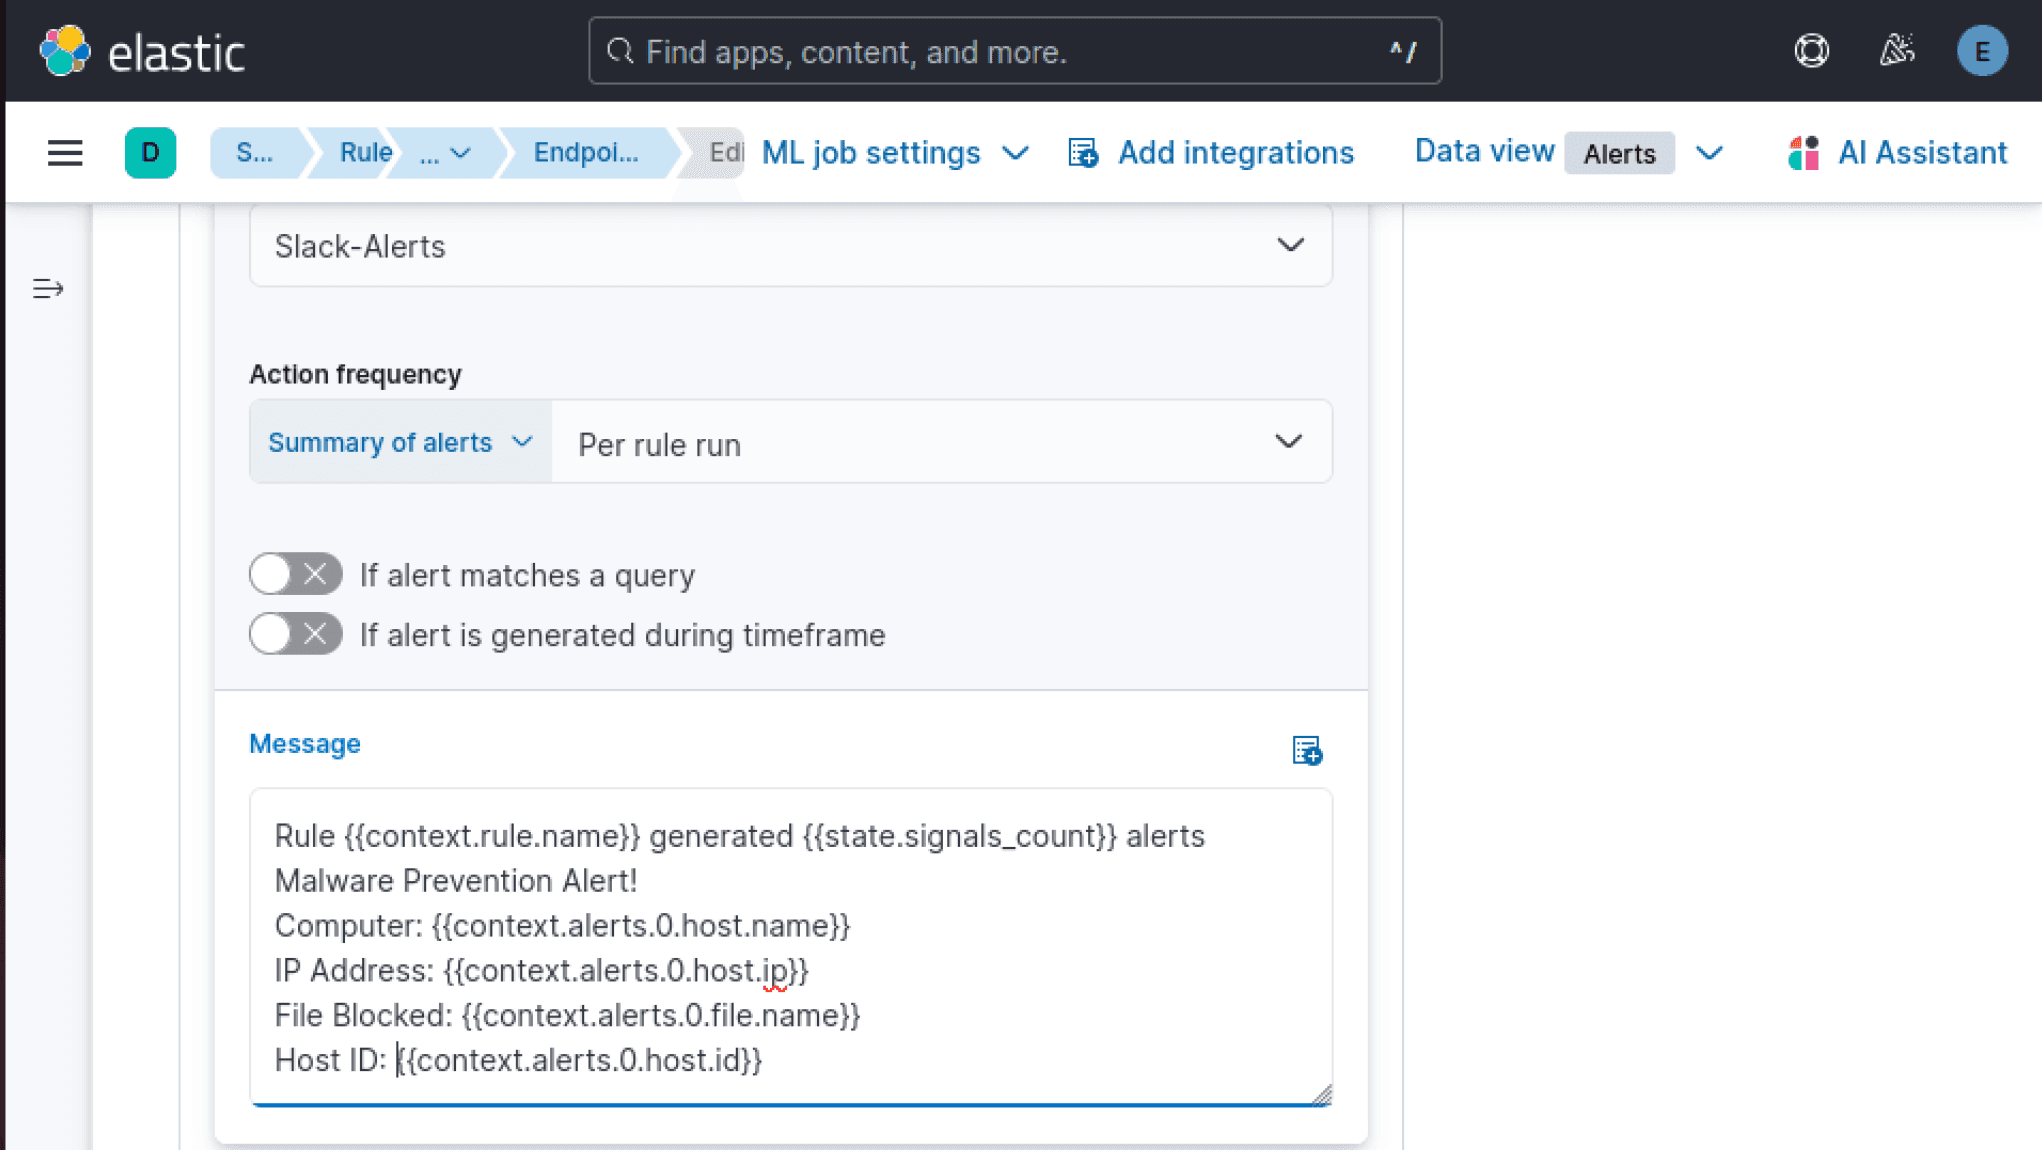
From our rule settings, we'll utilize our Slack connector created in our Bruteforce SSH Workflow project to create a new alert to send to Slack automatically when the alert is generated in Kibana

We can now test the workflow from Elastic Defend → Kibana Alerting → Resulting Slack Message. Firstly, we'll navigate to the Ubuntu user machine that Defend agent policy is running on and, once again, we will go to www.eicar.org, where we will download the test file again.


Straight away the download fails once again due to Elastic Defend detecting malicious file signatures

Next we can navigate to Kibana and find the alert generated. Due to our configuration changes, we should be able to check our Slack Channel and see the alert come through with the relevant details.

Next we can navigate to Kibana and find the alert generated. Due to our configuration changes, we should be able to check our Slack Channel and see the alert come through with the relevant details.

With these configurations in place, our virtual gateway should now be able to effectively serve as the egress point of the lab, and route traffic in, or out of the homelab environment correctly.

And just as before with our SSH rule, from Slack we can see that the rule name, context, hostname, IP Address, File name, and host ID have been provided in our channel message, as per the mustache templating performed before

And just as before with our SSH rule, from Slack we can see that the rule name, context, hostname, IP Address, File name, and host ID have been provided in our channel message, as per the mustache templating performed before

III. Domain & Tunnel Configration

To generate our Response URL and establish a location for Slack to send isolation commands, we need a secure method to route Slack’s external traffic into our internal lab environment, ultimately reaching our Kibana instance.


To achieve this, we will leverage Cloudflare, Cloudflare Tunnels, and PythonAnywhere. This setup will parse incoming Slack requests, validate them, and securely forward the isolation command to Kibana for execution.


We will begin by setting up a domain name with Cloudflare, which will act as our domain registrar and DNS manager, allowing us to create a stable external entry point for our automation workflow.

Compliance Considerations:


  • NIST 800-207 (Zero Trust Approach): By using Cloudflare Tunnels, we avoid directly exposing Kibana’s internal API to the internet, minimizing attack surfaces.


  • NIST 800-53 (API Security & Request Validation): Slack requests should be validated using Slack's signing secret to prevent unauthorized requests from reaching PythonAnywhere.


  • ISO 27001 (Cryptographic Controls): Cloudflare should enforce Full (Strict) SSL/TLS mode to ensure end-to-end encryptionbetween Slack, PythonAnywhere, and Kibana, preventing MITM (Man-in-the-Middle) attacks.

Now that Slack is working, we'll register a domain name to be used as the host for our web app that we'll begin developing shortly. Cloudflare will be our registrar


We'll register smmodded.net

Now that Slack is working, we'll register a domain name to be used as the host for our web app that we'll begin developing shortly. Cloudflare will be our registrar


We'll register smmodded.net

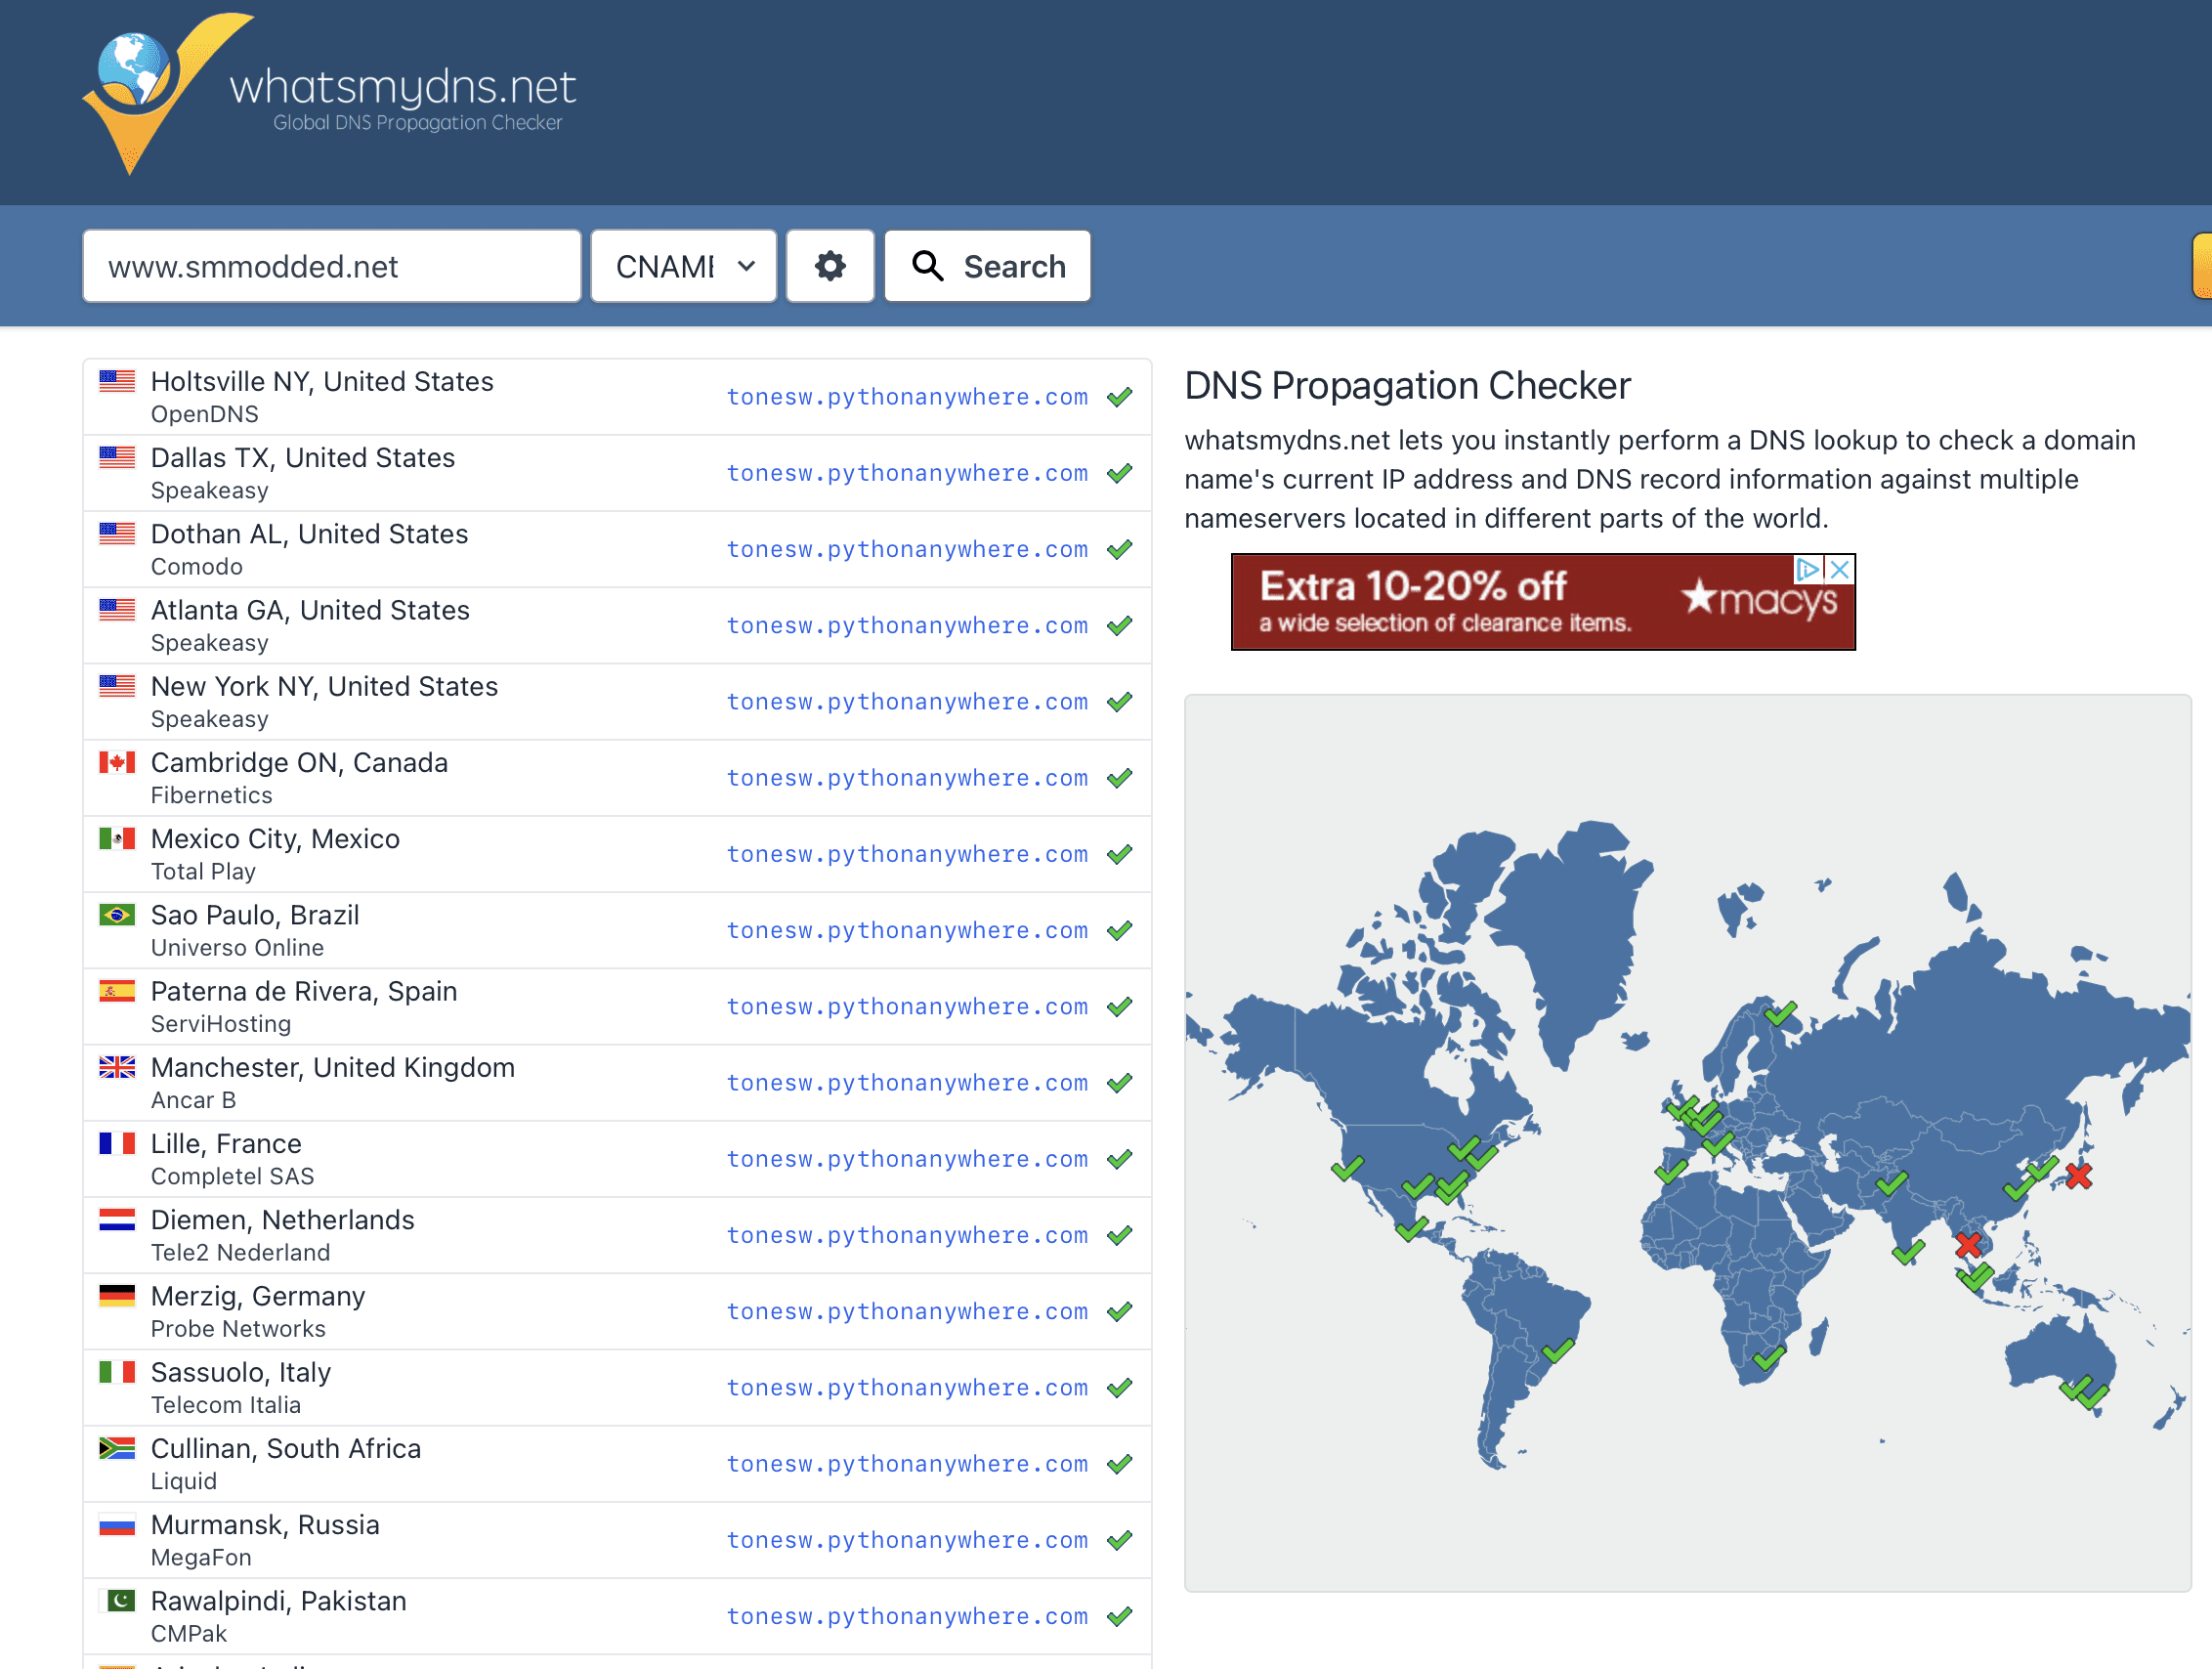
Next, we need to ensure that traffic coming from Slack to tonesw.pythonanywhere.com is securely forwarded to our internally hosted Kibana server. This requires configuring a Cloudflare Tunnel, which will act as a secure bridge between external traffic and our internal environment.

To set this up, navigate to your Cloudflare account dashboard, then:


  1. Access the Zero Trust Overview page.


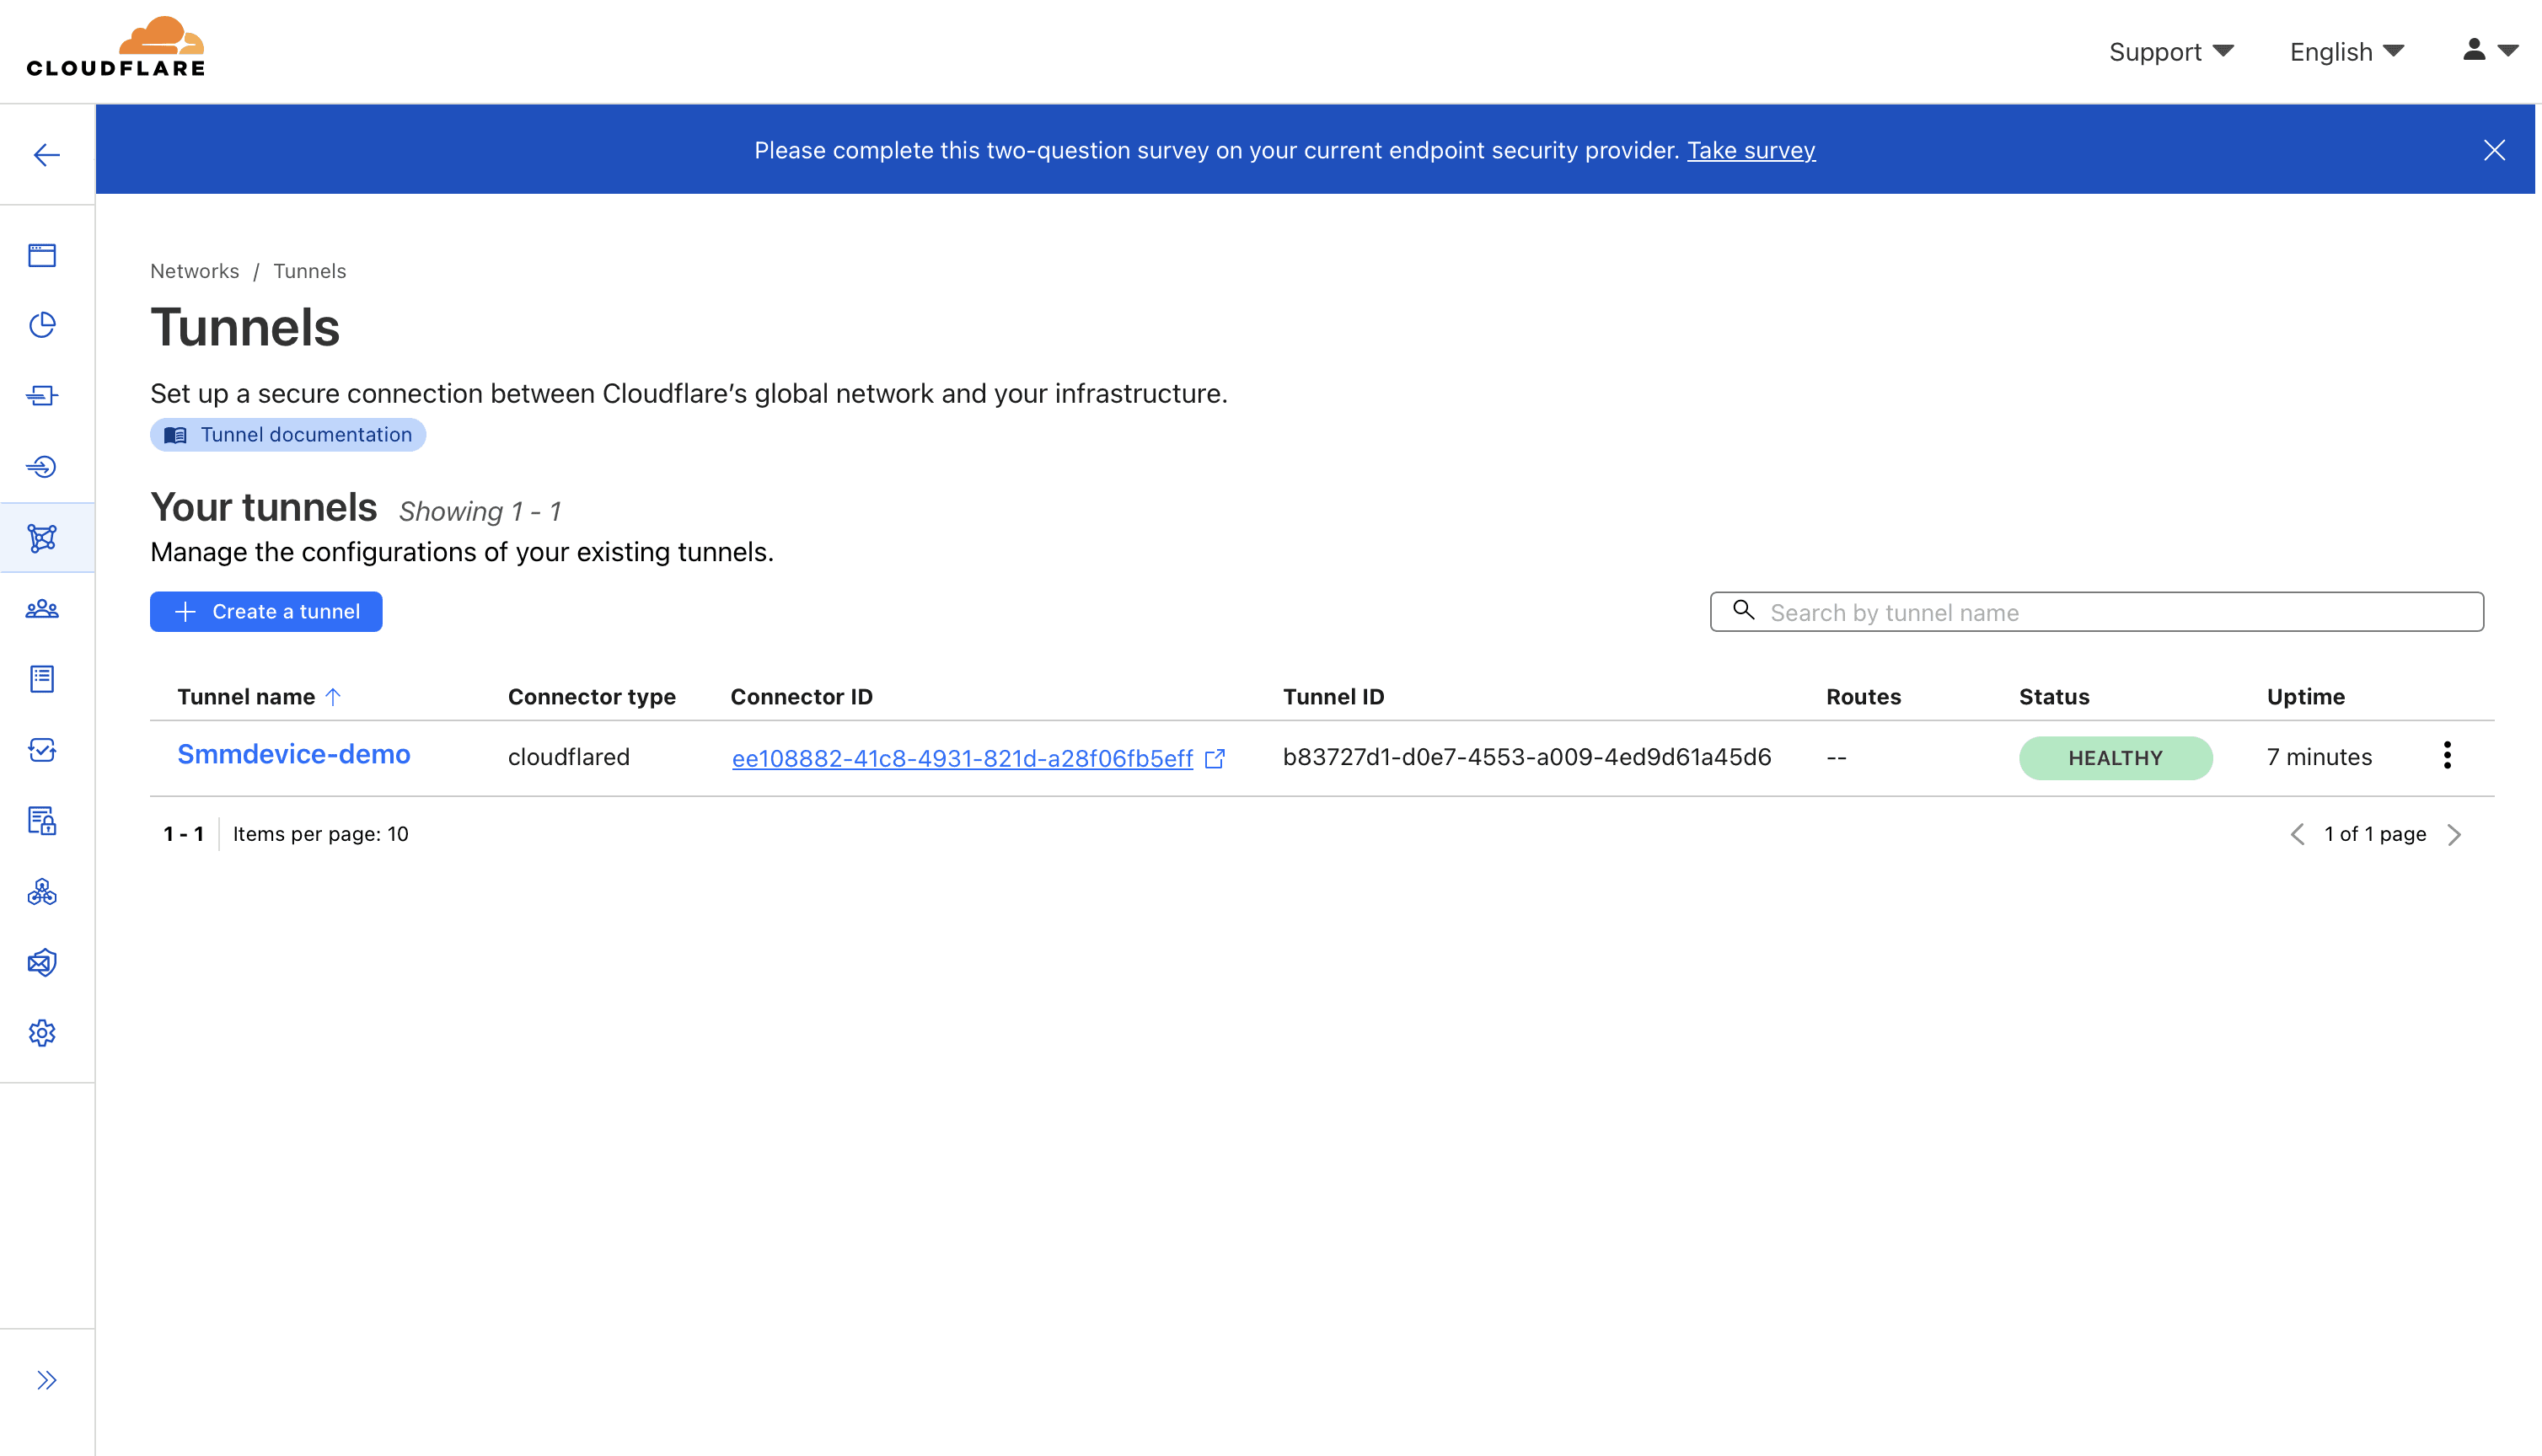
  1. Select "Tunnels" under the Network settings in the left pane.


  1. Create a new tunnel, which will securely route requests from PythonAnywhere to the Kibana API inside your lab environment.

Compliance Considerations:


  • ISO 27001 (Network Security): Cloudflare Tunnel encrypts all traffic between external clients (Slack, PythonAnywhere) and Kibana, ensuring no plaintext data is exposed during transit.


  • NIST 800-27 (Zero Trust Architecture): Cloudflare Tunnel eliminates the need for opening direct inbound ports, reducing attack surfaces. NIST 800-27 which advises hiding internal resources from direct exposure and using brokered, authenticated access for external services.


  • NIST 800-53 (SC-12, SC-13, SC-31) – Enforces encryption for system communications.

On the next menu, we'll select the Cloudflared offering

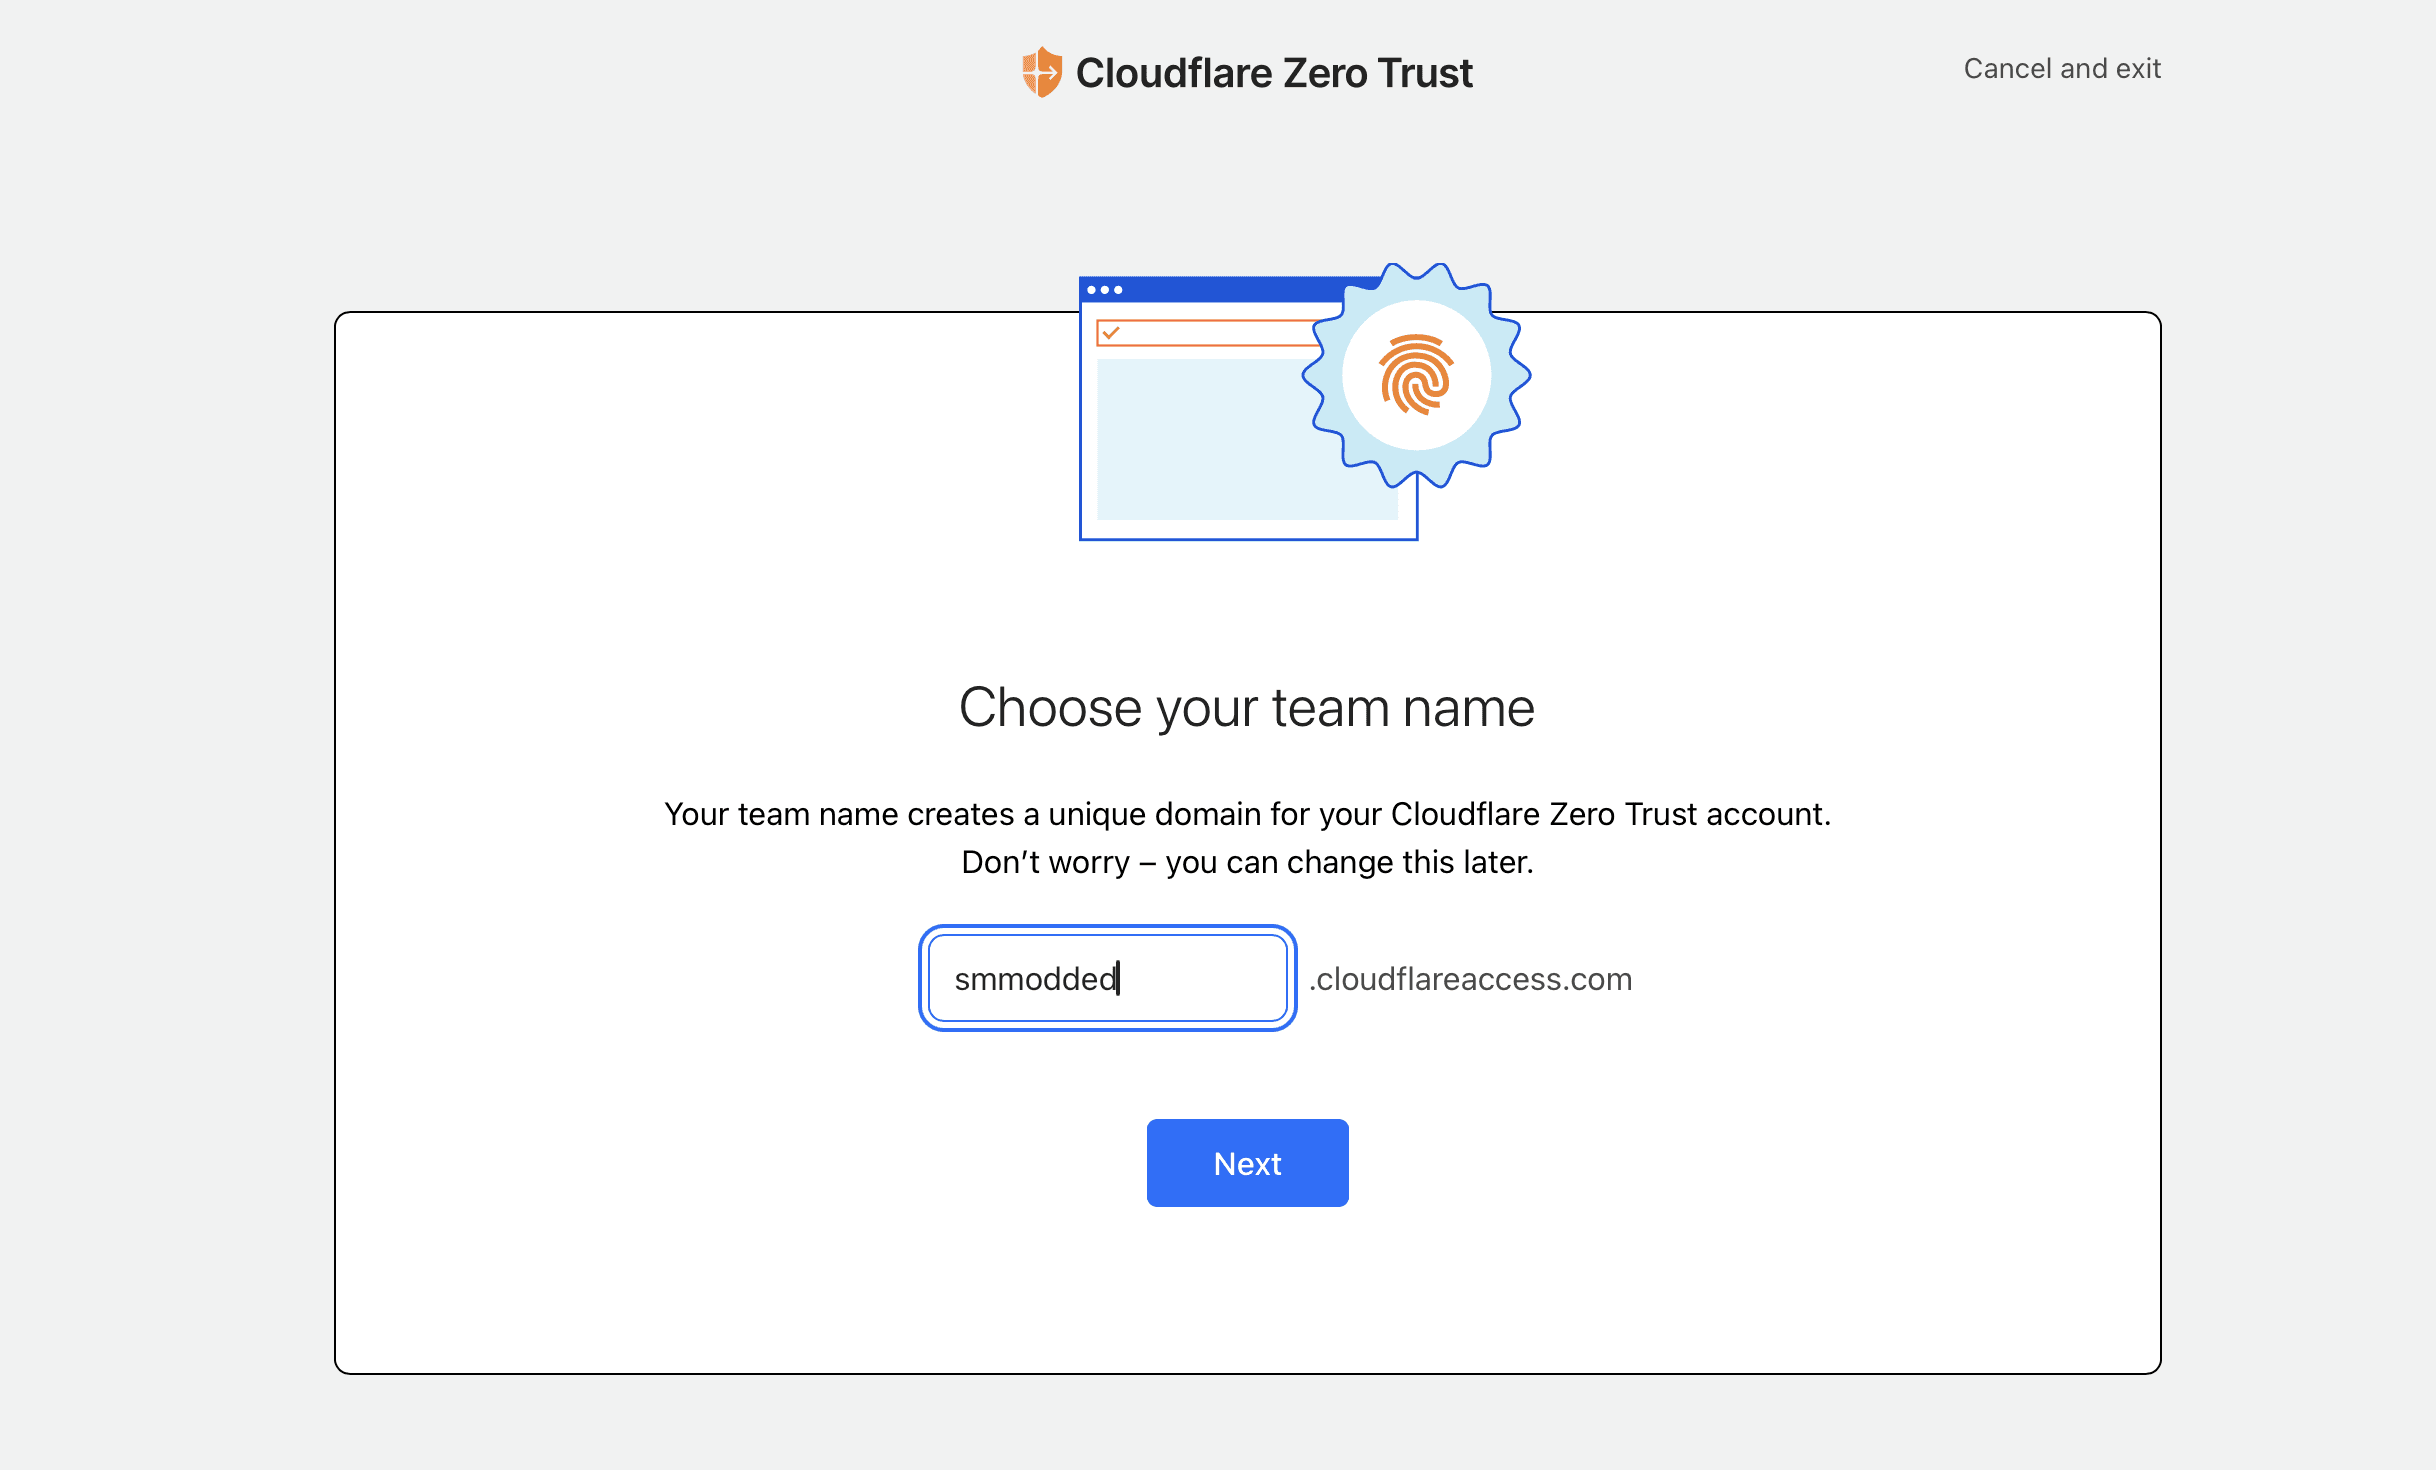
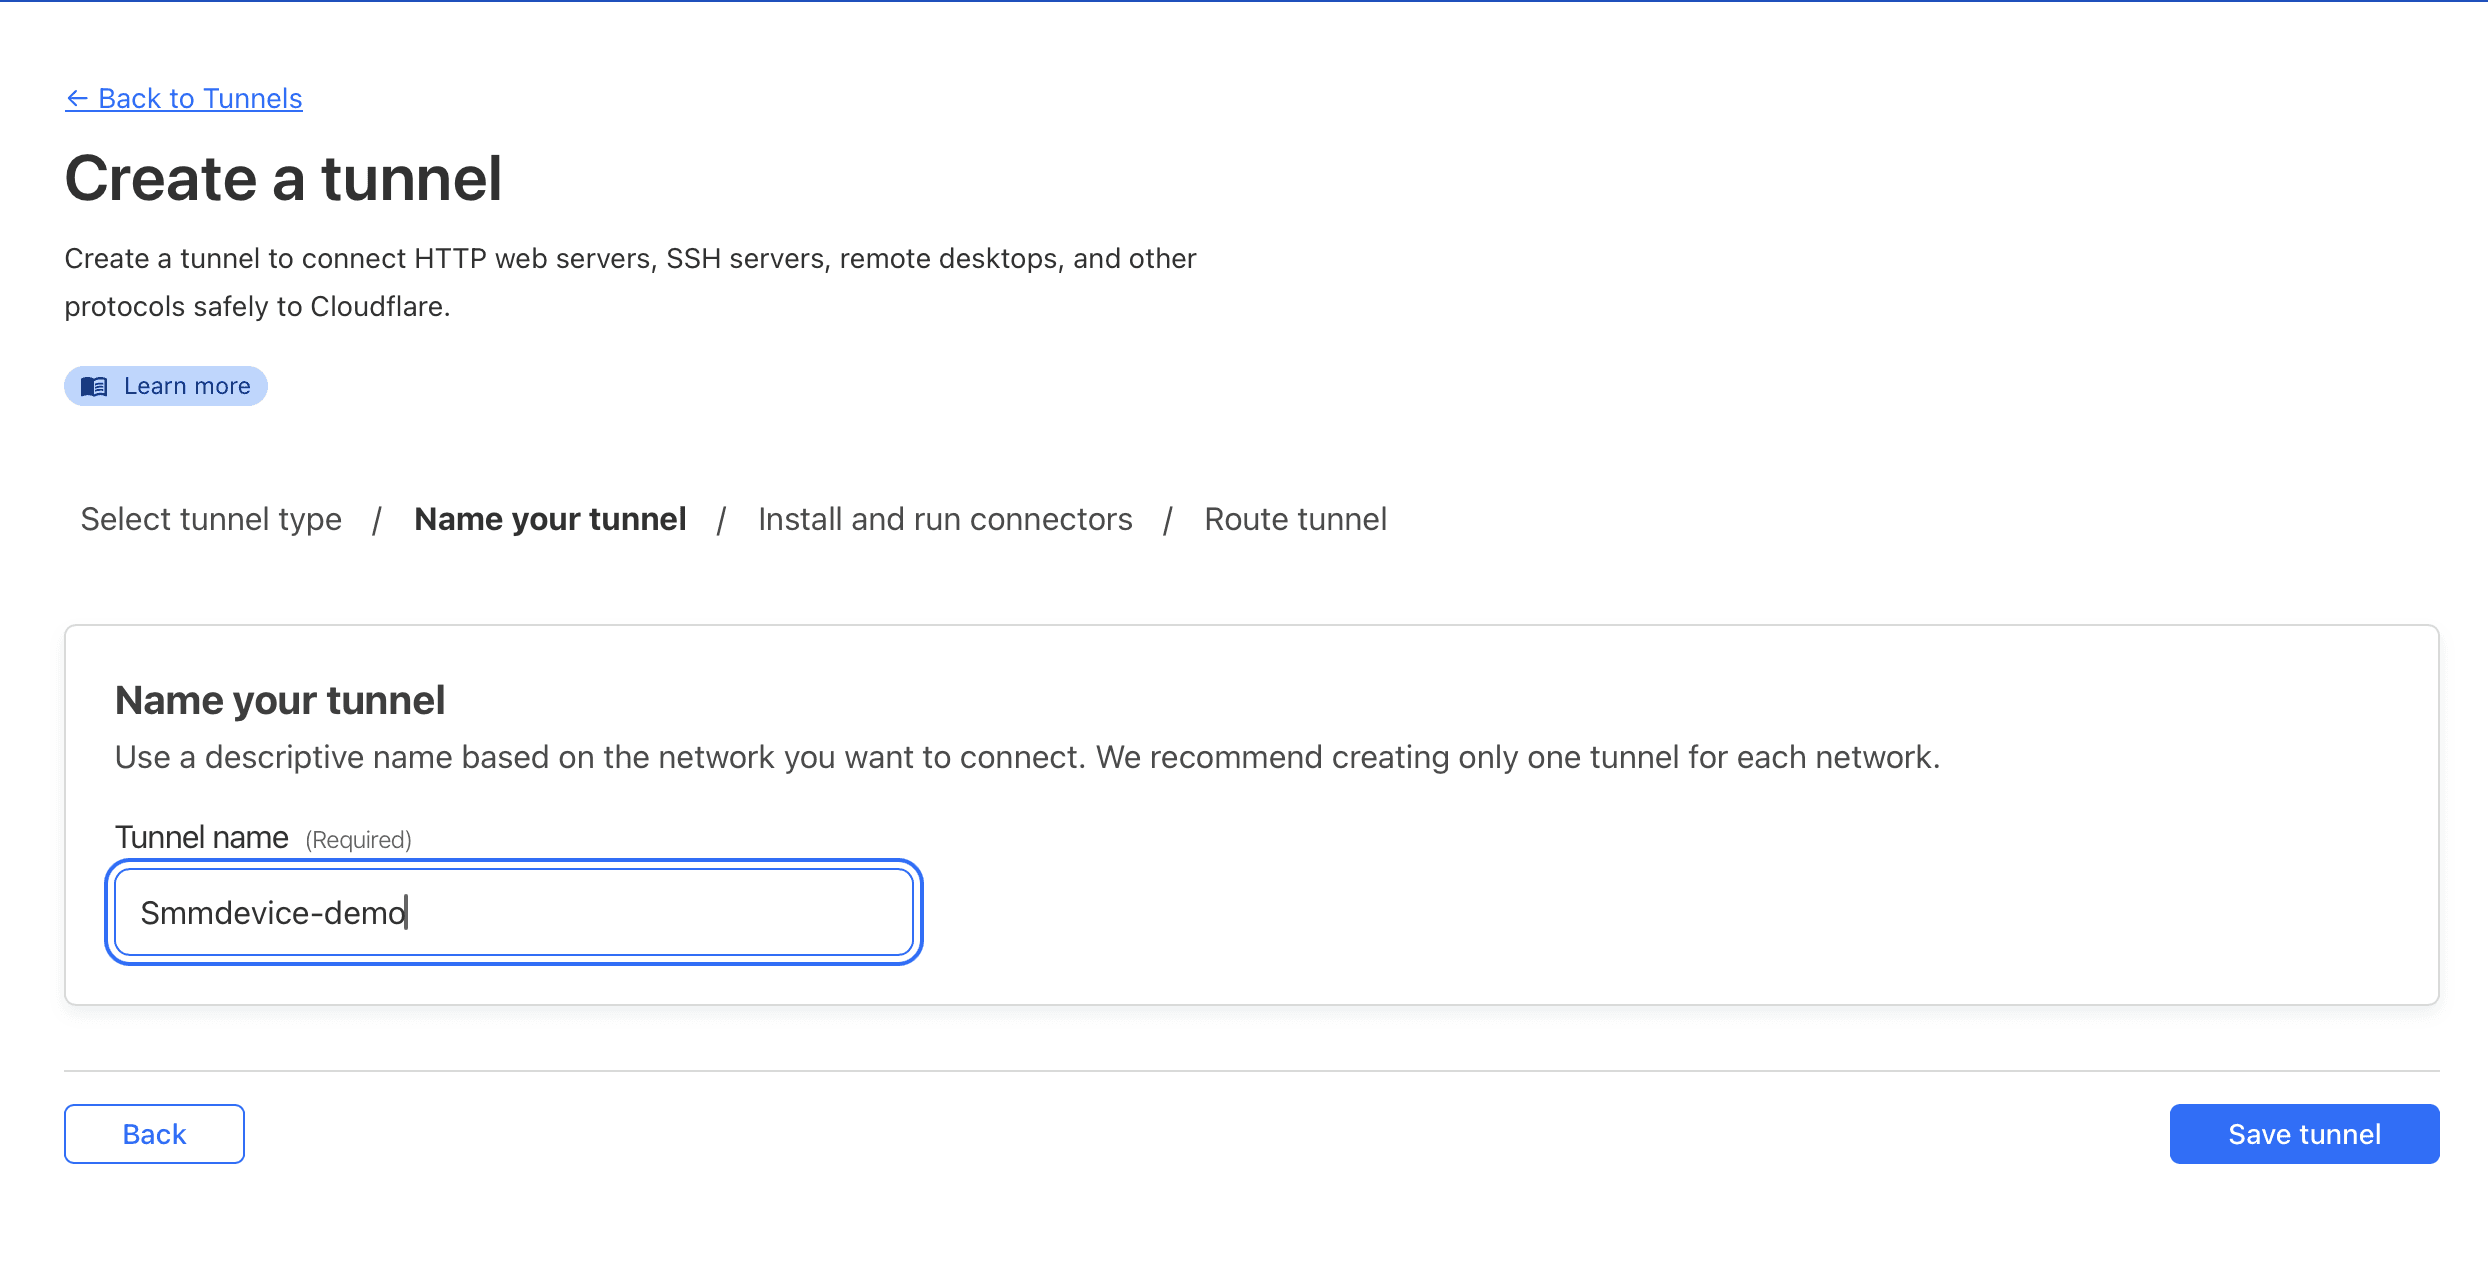
Next, we need to name our Cloudflare Tunnel and generate a unique authentication token. This token will be used to install and authenticate the Cloudflared service on our Kibana machine, allowing it to securely communicate with Cloudflare.


Next we we will install the cloudflared service on the Kibana machine, using our (now destroyed at time of writing) token.


After installation, we will update the Cloudflared service by pulling the latest version from GitHub, ensuring we are using the most up-to-date and secure version of the software.

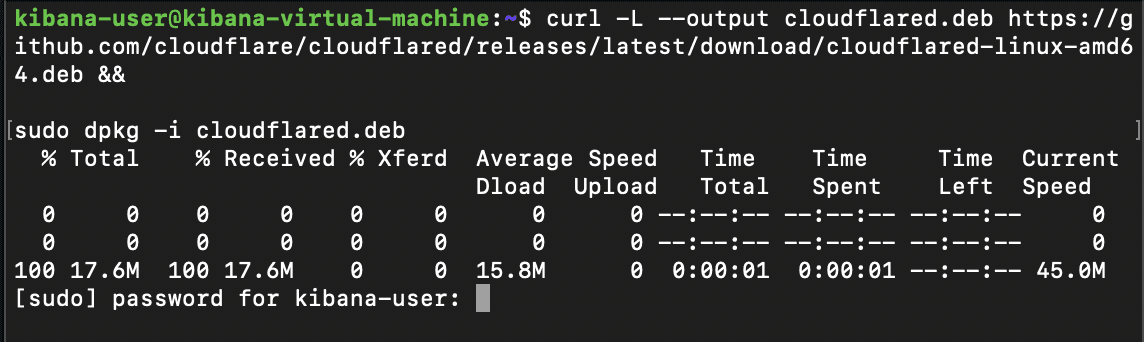
And we can see that our tunnel is connected and working!

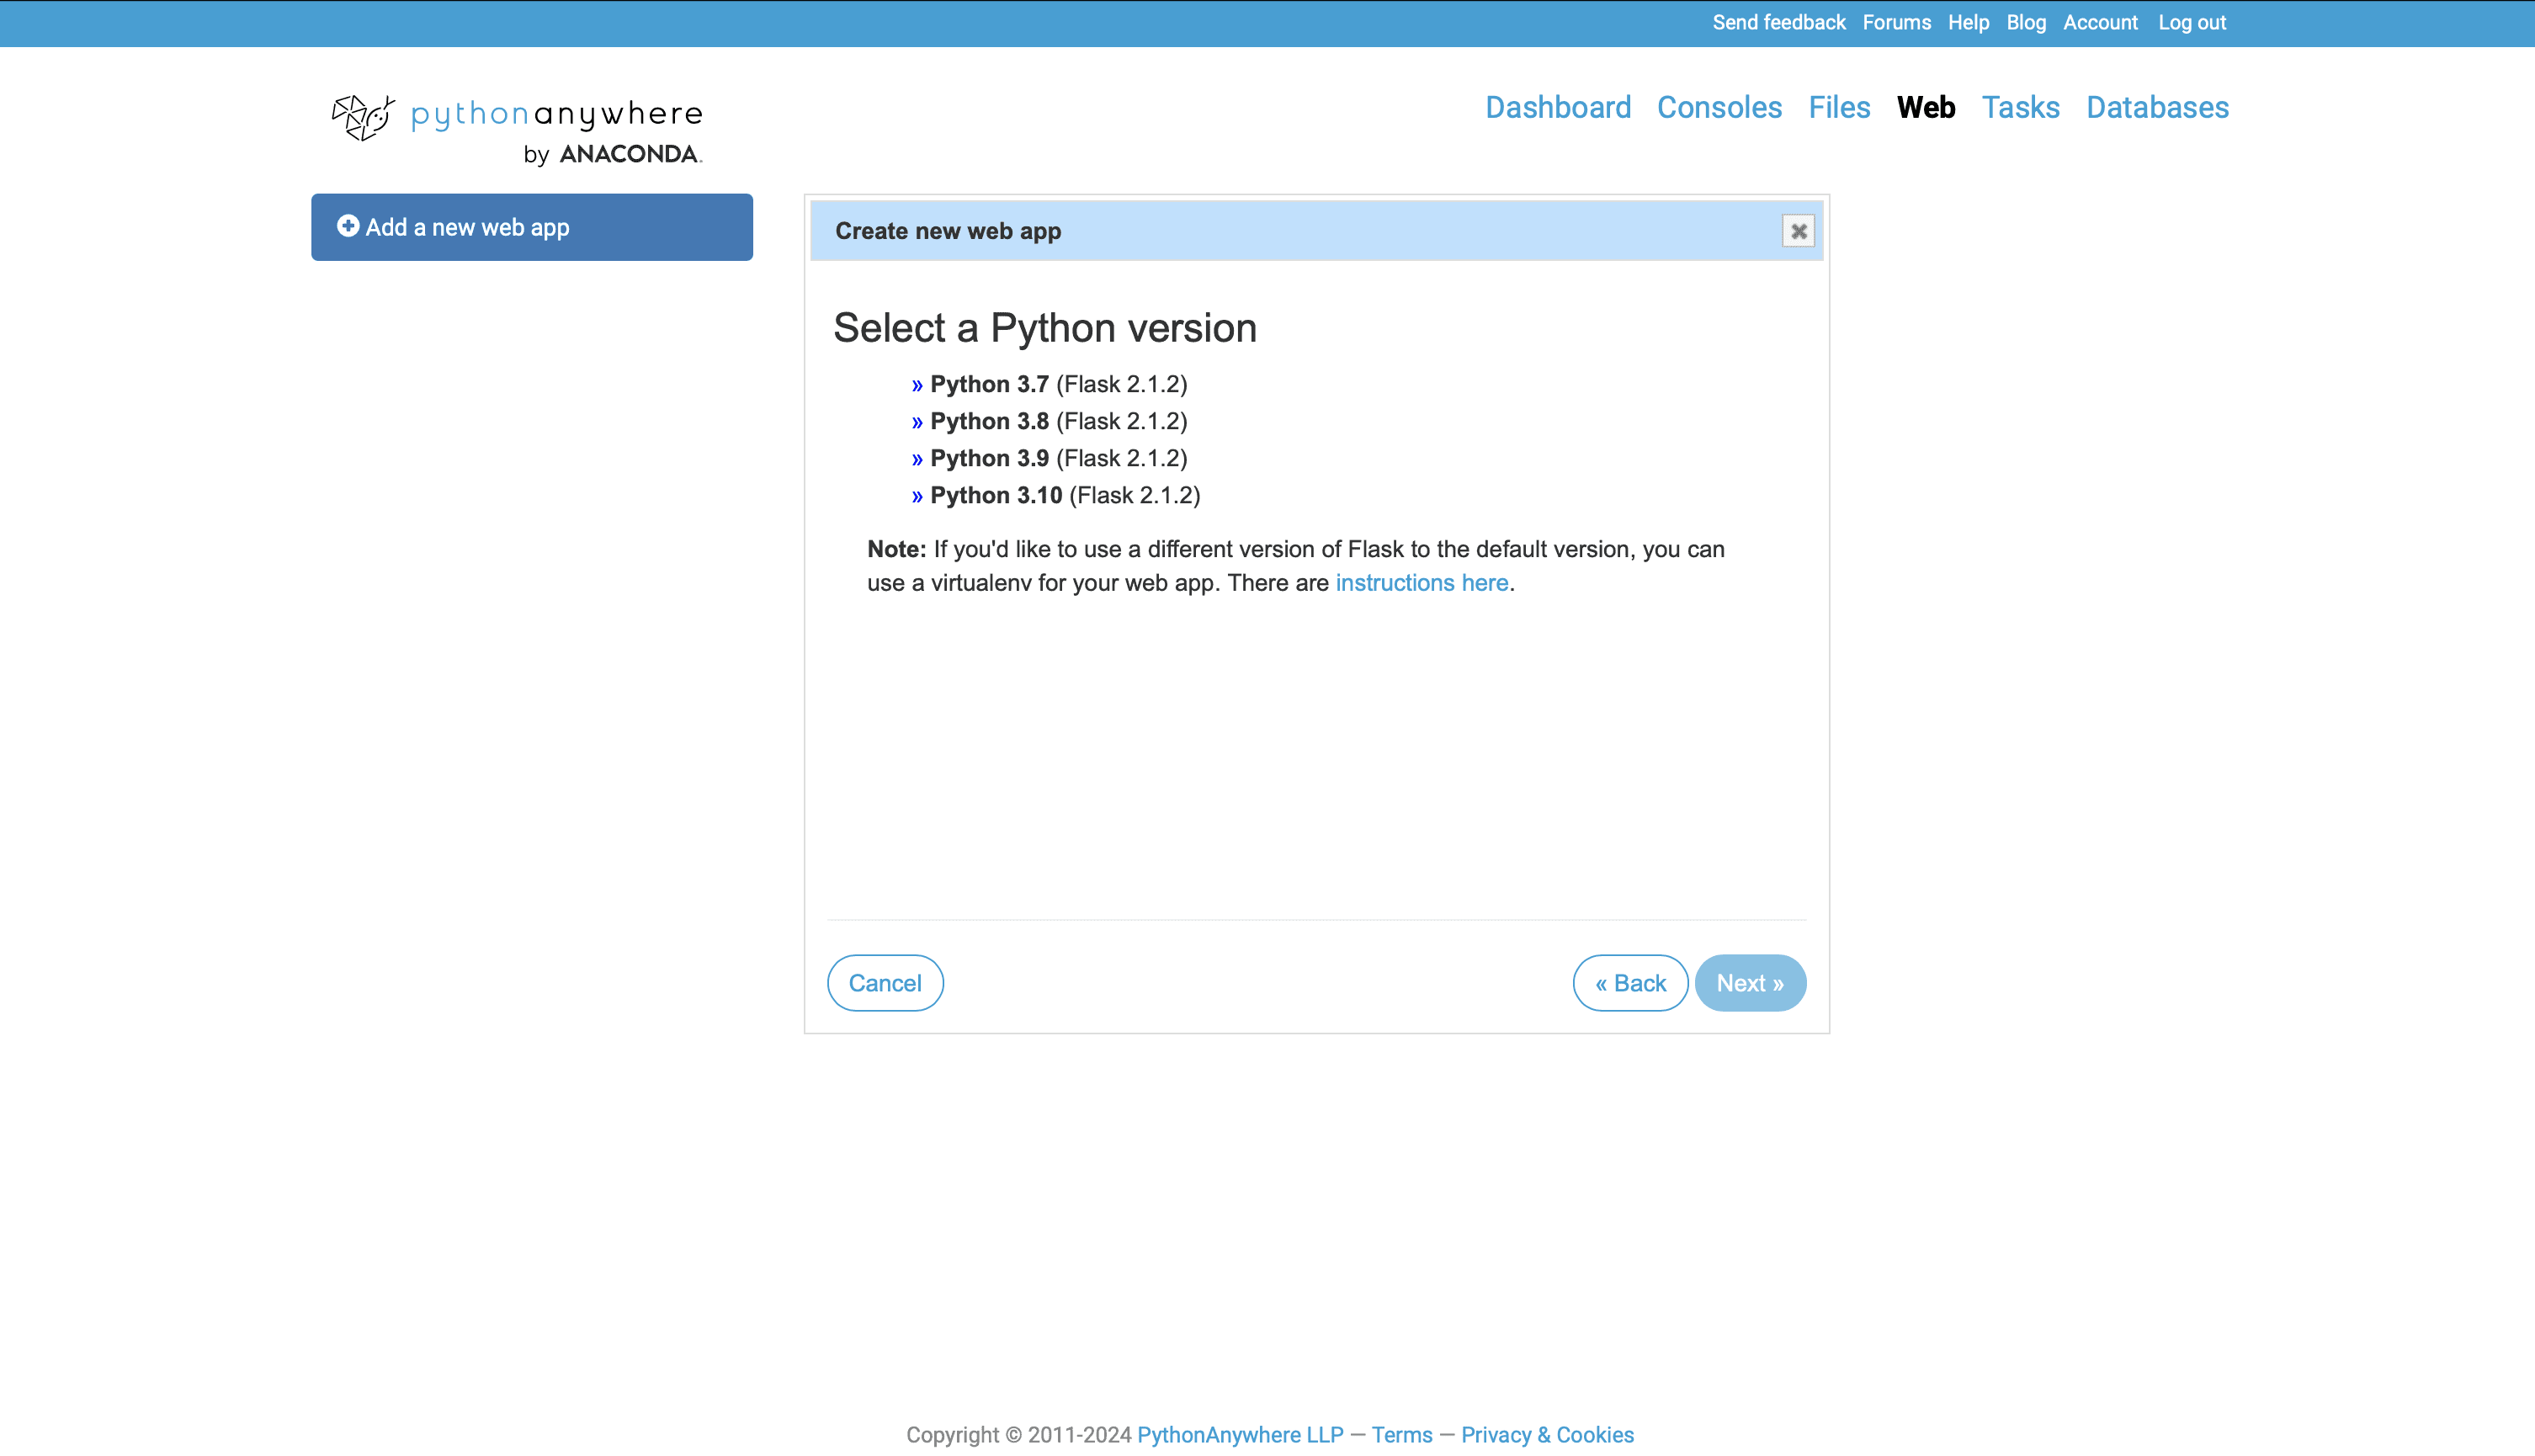
IV. PythonAnywhere App Deployment

Next, we will navigate to PythonAnywhere, which will be used to deploy our parsing script and handle incoming Slack isolation requests. This setup will allow us to process commands from Slack and securely forward them to Kibana via Cloudflare Tunnel.

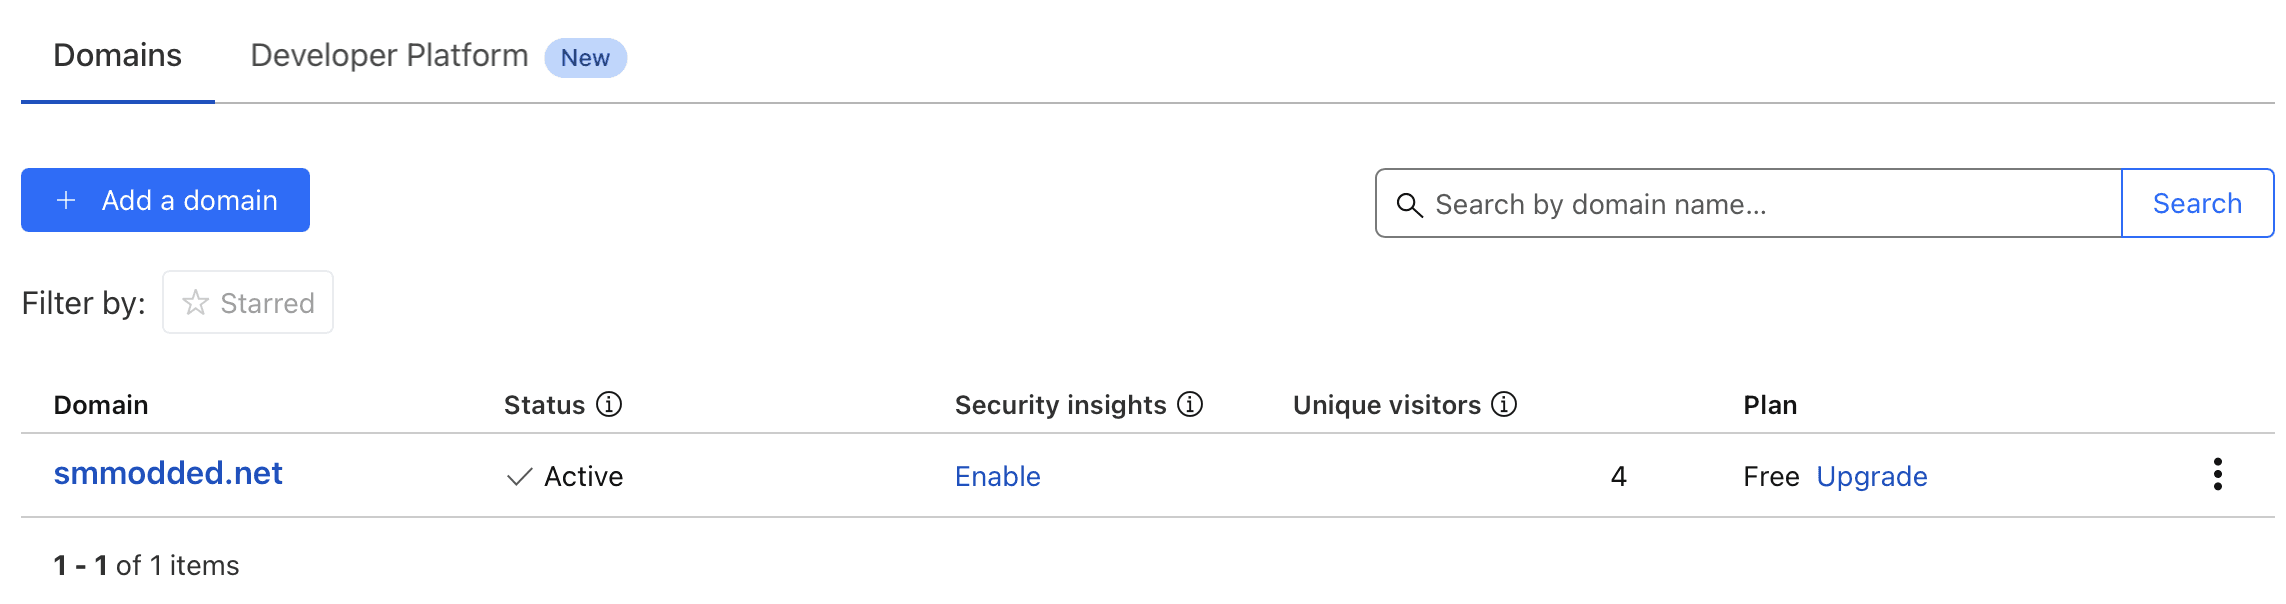
To begin, we'll create a PythonAnywhere account, and link our smmodded.net domain to it, ensuring that Slack requests can be properly routed.


This setup will provide a stable external endpoint for receiving Slack commands while keeping our Kibana instance internal and protected.

After setting up our account and linking our domain, we'll then create a redirect by navigating to the DNS settings within Cloudflare and creating a new CNAME record for "www" to redirect to our tonesw.pythonanywhere.com URL


This should link our domain name to our pythonanywhere as an alias, allowing for the traffic to be sent by our Slack app to appropriately make its way to smmodded.net, where it can be forwarded to kibana.api.smmodded.net

After completing this, we can access whatsmydns.net to make sure that propagation has taken place successfully

After completing this, we can access whatsmydns.net to make sure that propagation has taken place successfully

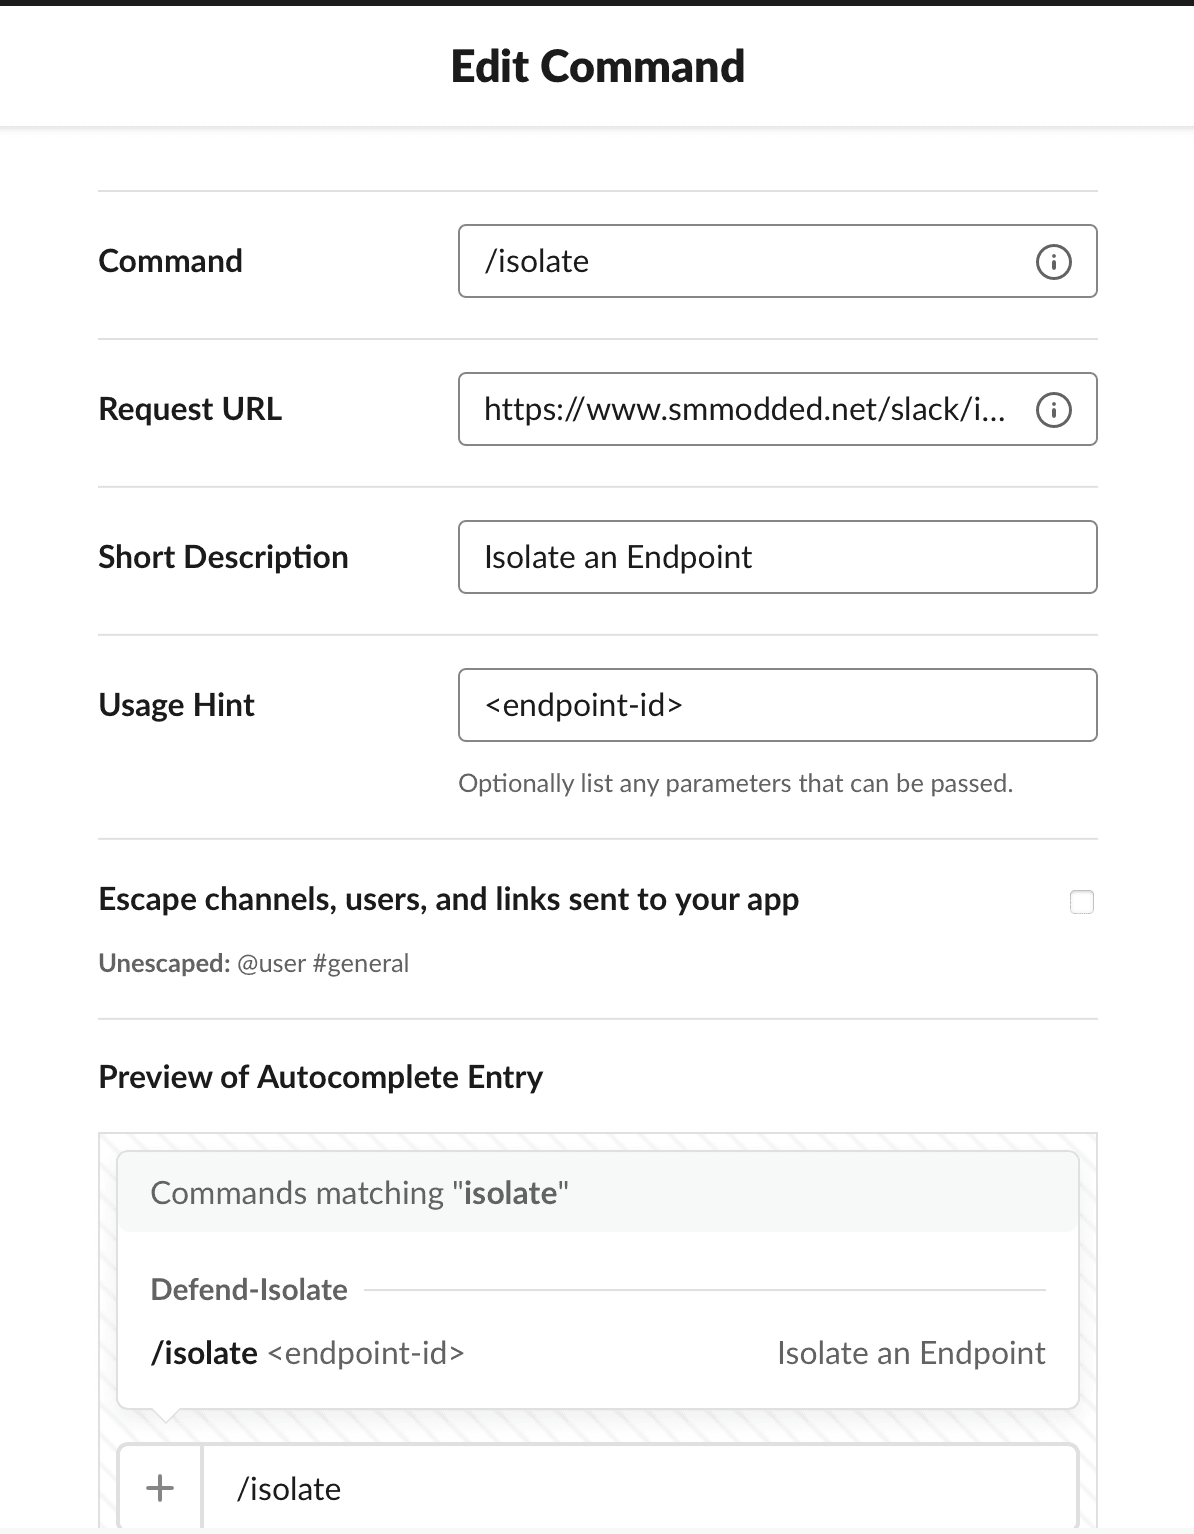
Once the app is created, we'll need to create the /isolate command. The Request URL we will supply will act as a web address where Slack sends a HTTP POST request when an event, slash command, or interactive action occurs.


In this case, Slack will send data to the Request URL so that our PythonAnywhere service can process the request and return a response.


We'll set the Request URL to:


https://smmodded.net/slack/isolate

The smmodded.net will refer to our CNAME entry, but the /slack/isolate will be the directory where our webapp will reference for Slack requests as shown when we begin creating it


After completing, we'll install the app into Demo Org

Now, we will create our Flask web application, which will parse incoming Slack requests and generate an API call to Kibana to isolate the requested machine whenever the /isolate command is executed.

To begin, we'll select the Flask Python Web Framework as the Development environment and elect to run Python v.3.10 as the runtime version to ensure compatibility with flask and required dependencies


Once set up, this Flask app will act as the middleware between Slack and Kibana, securely validating requests before executing an endpoint isolation command.

Before developing the request-handling logic, we need to import the necessary libraries for secure API processing. Given that this exposes our API publicly on the web, we'll need Slack's signing secret value with matching signature in order to verify that requests that arrive at our website actually come from the Slack Demo Org workspace.


For this, we'll import hmac, hashlib, and time (to prevent replay attacks), request to handle incoming HTTP requests, and requests to handle outgoing HTTPS requests. We'll also import jsonify for converting python dictionaries back to JSON requests for Slack, and abort to stop the processing of requests and returning of HTTP error codes for error handling

import hmac

import hashlib

import time

from flask import Flask, request, jsonify, abort

import requests

import hmac

import hashlib

import time

from flask import Flask, request, jsonify, abort

import requests

Compliance Considerations:


  • NIST 800-53 (SC-12: Cryptographic Key Establishment and Management): Requires cryptographic validation of incoming API requests.


  • ISO 27001: (User Authentication and Validation): Requires ensuring that API access tokens and authentication requests expire after a short duration.

We will then need to declare three constants:


  • SLACK_SIGNING_SECRET

    Used to verify that incoming requests originate from Slack


  • KIBANA_SERVER_URL

    The base URL of our Kibana Instance (this will set our tunnel as the next-hop address)


  • KIBANA_API_KEY

    The API key Flask will use to utilize the Kibana API


Next we will pull the signature value from Slack using the X-Headers and define these in the slack_signature and slack_timestamp variables

Next we will pull the signature value from Slack using the X-Headers and define these in the slack_signature and slack_timestamp variables

def verify_slack_signature():

"'"Verify the Slack request signature to ensure authenticity."""

slack_signature = request.headers.get("X-Slack-Signature", " ")

slack_timestamp = request.headers.get("X-Slack-Request-Timestamp" , "")

From here, we can compare the current time with the included timestamp variable to determine if the request is older than 10 minutes or not. To avoid replay attacks, we will stop processing the HTTP request if it is

From here, we can compare the current time with the included timestamp variable to determine if the request is older than 10 minutes or not. To avoid replay attacks, we will stop processing the HTTP request if it is

# Reject requests older than 10 minutes to prevent replay attacks

if abs(time.time() - int(slack_timestamp)) > 60 * 10:

abort (400, "Request timestamp is too old")

If the timestamp is recent enough, we will begin recreating the slack signature by first building a base string using the expected timestamp and request body, then use hmac with the signing secret to hash the string.


Note that we must decode the string to convert the binary data into a string so that it can be used with Python, then re-encode the string into a byte string, as hmac requires binary data to compute the hash. The logic for generating hmac signatures is directly based on Slack's official documentation

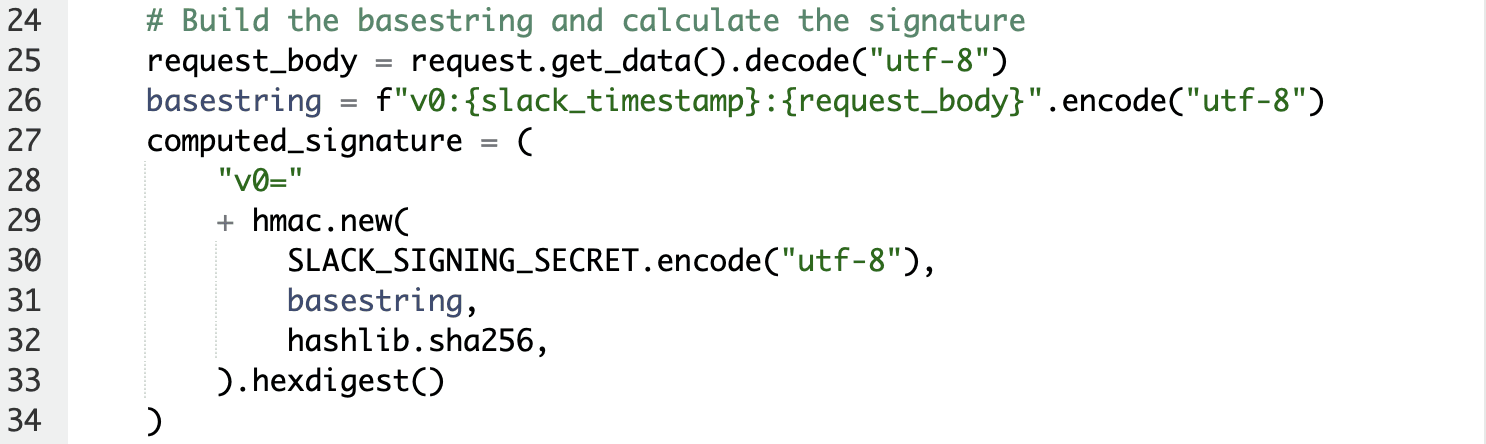
# Build the basestring and calculate the signature

request_body = request.get_data().decode("utf-8")

basestring = f"VO:{slack_timestamp}:{request_body}".encode("utf-8")

computed_signature = (

"vO="

+ hmac.new(

SLACK_SIGNING_SECRET.encode("utf-8"), basestring, hashlib. sha256,

). hexdigest()

)

Next we'll write a line to abort processing if there is a signature mismatch

Next we'll write a line to abort processing if there is a signature mismatch

With Slack request validation in place, we are now ready to write the function that will send a POST request to the Kibana API to isolate the specified endpoint.

To begin, we need to set the HTTP headers, which will include:


  • Authorization – This header will contain the API key required to authenticate the request with Kibana.


  • Content-Type – This will be set to application/json, ensuring that the request body is correctly formatted as JSON.


Additionally, we will define the request payload, which will include the endpoint ID of the machine that needs to be isolated.

Next we will define the URL of the Kibana API function using the base URL as well as the API address provided by the Kibana REST API documentation.


We will also define error handling, given that Kibana API should respond with a 200 response code if he isolation was successful.


Finally, we'll return the response object to the calling function

Next, we'll map the slack_isolate function to /slack/isolate HTTP POST method to handle incoming Slack commands. We'll also need to call the verify_flask_signature function to ensure that the request is legitimate

Next, we'll map the slack_isolate function to /slack/isolate HTTP POST method to handle incoming Slack commands. We'll also need to call the verify_flask_signature function to ensure that the request is legitimate

Next, we need to extract the Slack payload from the incoming request and save it to a variable called slack_payload. This payload contains the text field (or command input) from the Slack request form data.

From this payload, we can extract the required endpoint ID, which is submitted by the analyst when executing the /isolate command.

If the command is empty, we'll need to return a JSON object (for Slack) that contains an error message prompting that invalid command syntax was used

If the command is empty, we'll need to return a JSON object (for Slack) that contains an error message prompting that invalid command syntax was used

From here, we can declare the endpoint_id from the command_text variable defined withing the parsed slack_payload variable

From here, we can declare the endpoint_id from the command_text variable defined withing the parsed slack_payload variable

Next, we will implement an if statement to define the appropriate response to Slack based on whether the isolation action was successful. The response will be determined by checking the status code from the Kibana API request.

If the status code is 200, we will return a success message to Slack. Otherwise, we will provide an error message with details about the failure. To format the response properly for Slack, we will use the jsonify library.

We can finalize the app by running on all network interfaces over tcp/5000

We can finalize the app by running on all network interfaces over tcp/5000

V. Slack App Configuration

Now that our connector is confirmed working with Kibana alerting, we'll next want to add some interactabiltiy with our Slack channel, wherein that a channel member can use a /isolate slash command in order to automatically utilize Kibana API to isolate the affected endpoint.


To begin, we'll need to create a Slack app. Firstly, we'll navigate to api.slack.com and select Create a New App. We'll name our app Defend-Isolate, and make it a part of our same, previously created, Demo Org Workspace

Next, we will configure our Slack app to support communication with our web app by enabling Incoming Webhooks. This will allow us to send responses back to Slack when an isolation command is processed.


After enabling Webhooks, we will set up the /isolate Slack command, which requires specifying a Response URL. This is the endpoint where Slack will send HTTP POST requests when the command is executed. The Response URL should point to our PythonAnywhere web app, ensuring that isolation requests are properly routed and processed.

Compliance Considerations:


  • NIST 800-53 (SC-12: Cryptographic Key Establishment and Management): Ensures secure transmission of API requests.


  • OWASP API Security Top 10 (API2: Broken User Authentication) – Recommends validating incoming webhooks using cryptographic signatures.

Compliance Considerations:


  • NIST 800-53 (SC-12: Cryptographic Key Establishment and Management): Ensures secure transmission of API requests.


  • OWASP API Security Top 10 (API2: Broken User Authentication) – Recommends validating incoming webhooks using cryptographic signatures.

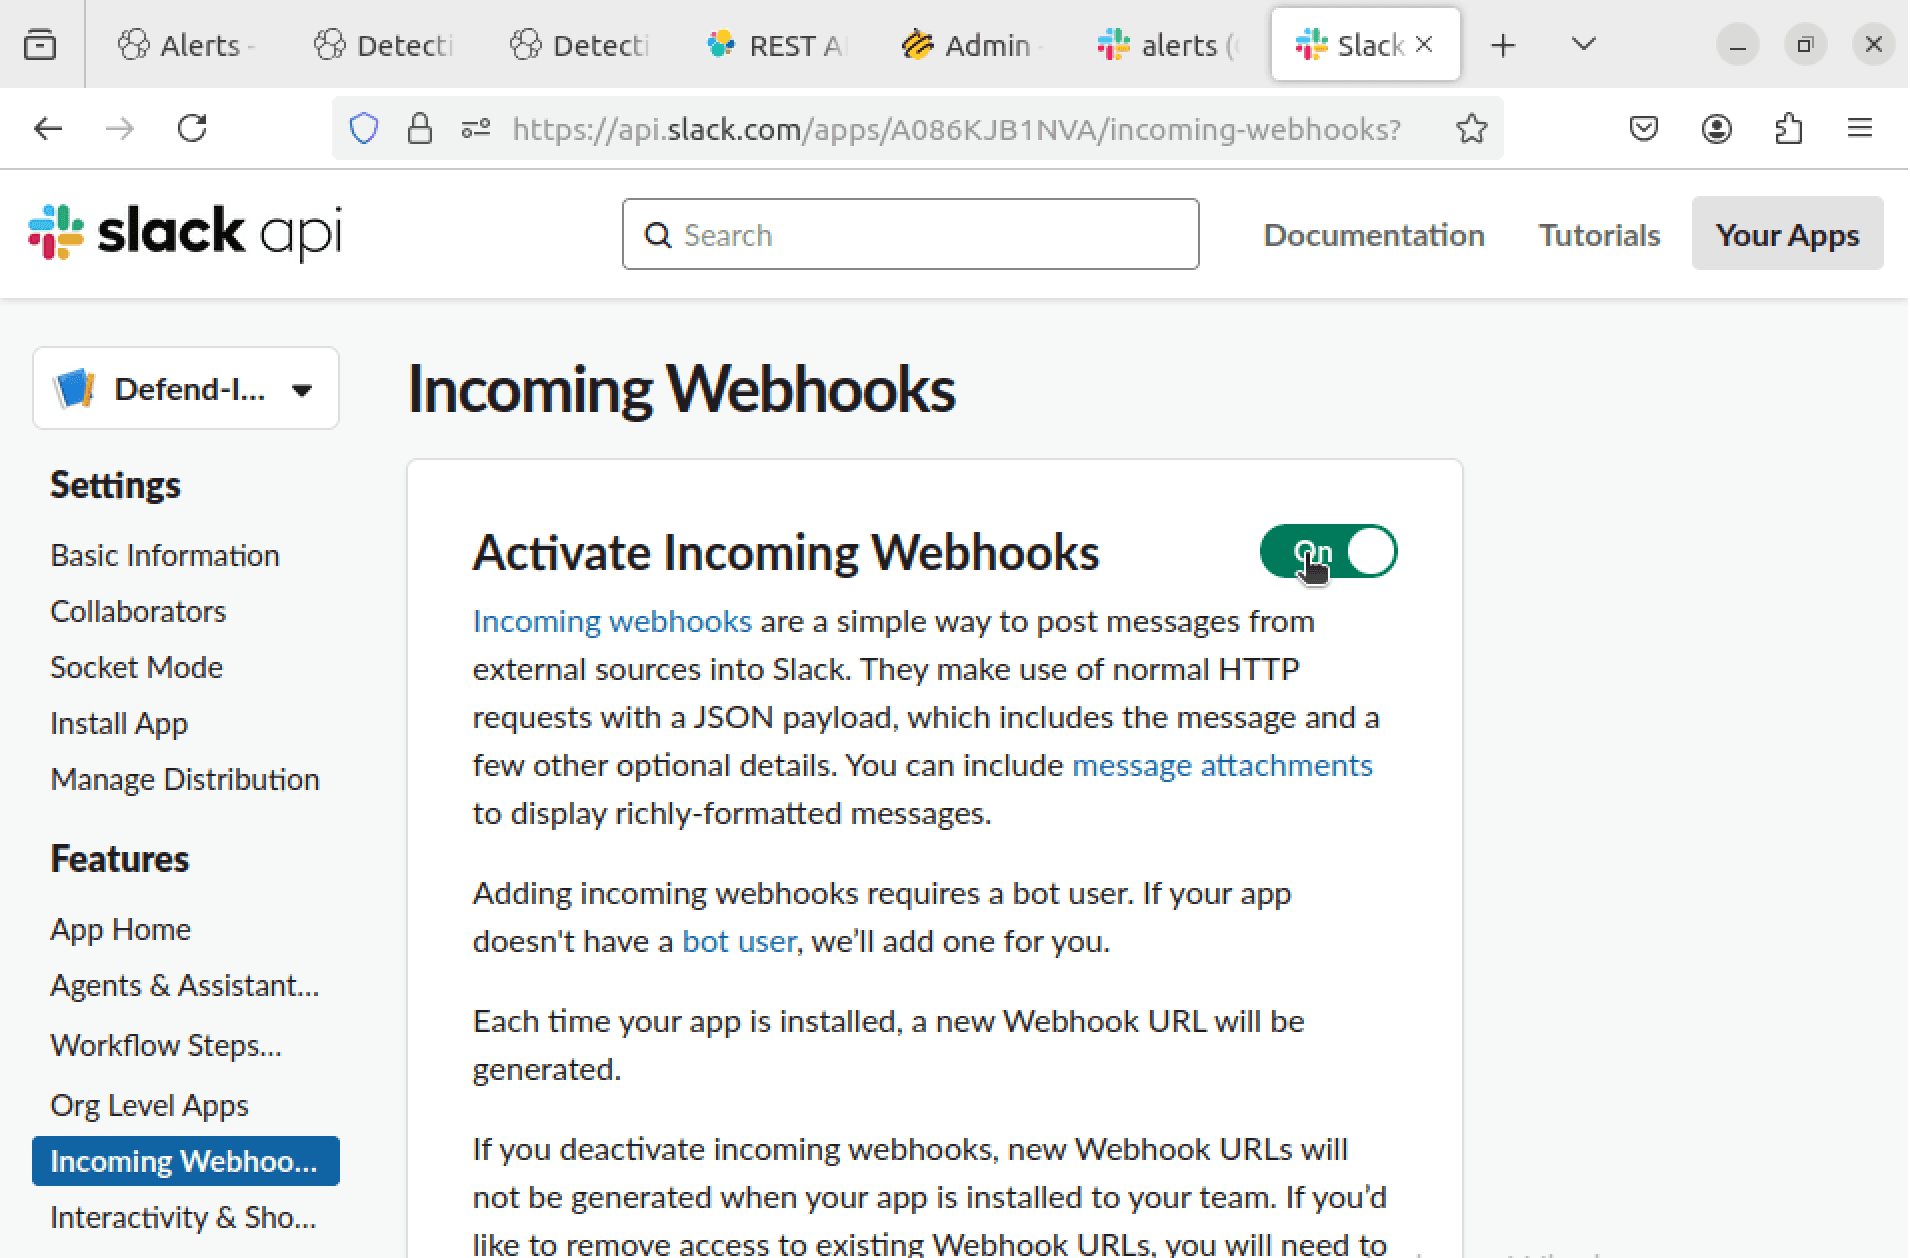
Finally, in order for Slack to send requests to https://smmodded.net, the website must have a valid certificate. For this, we'll use CloudFlare's Edge Certificate service through their Advanced Certificate Manager


First, we'll navigate to Edge Certificates and select Order Advanced Certificate

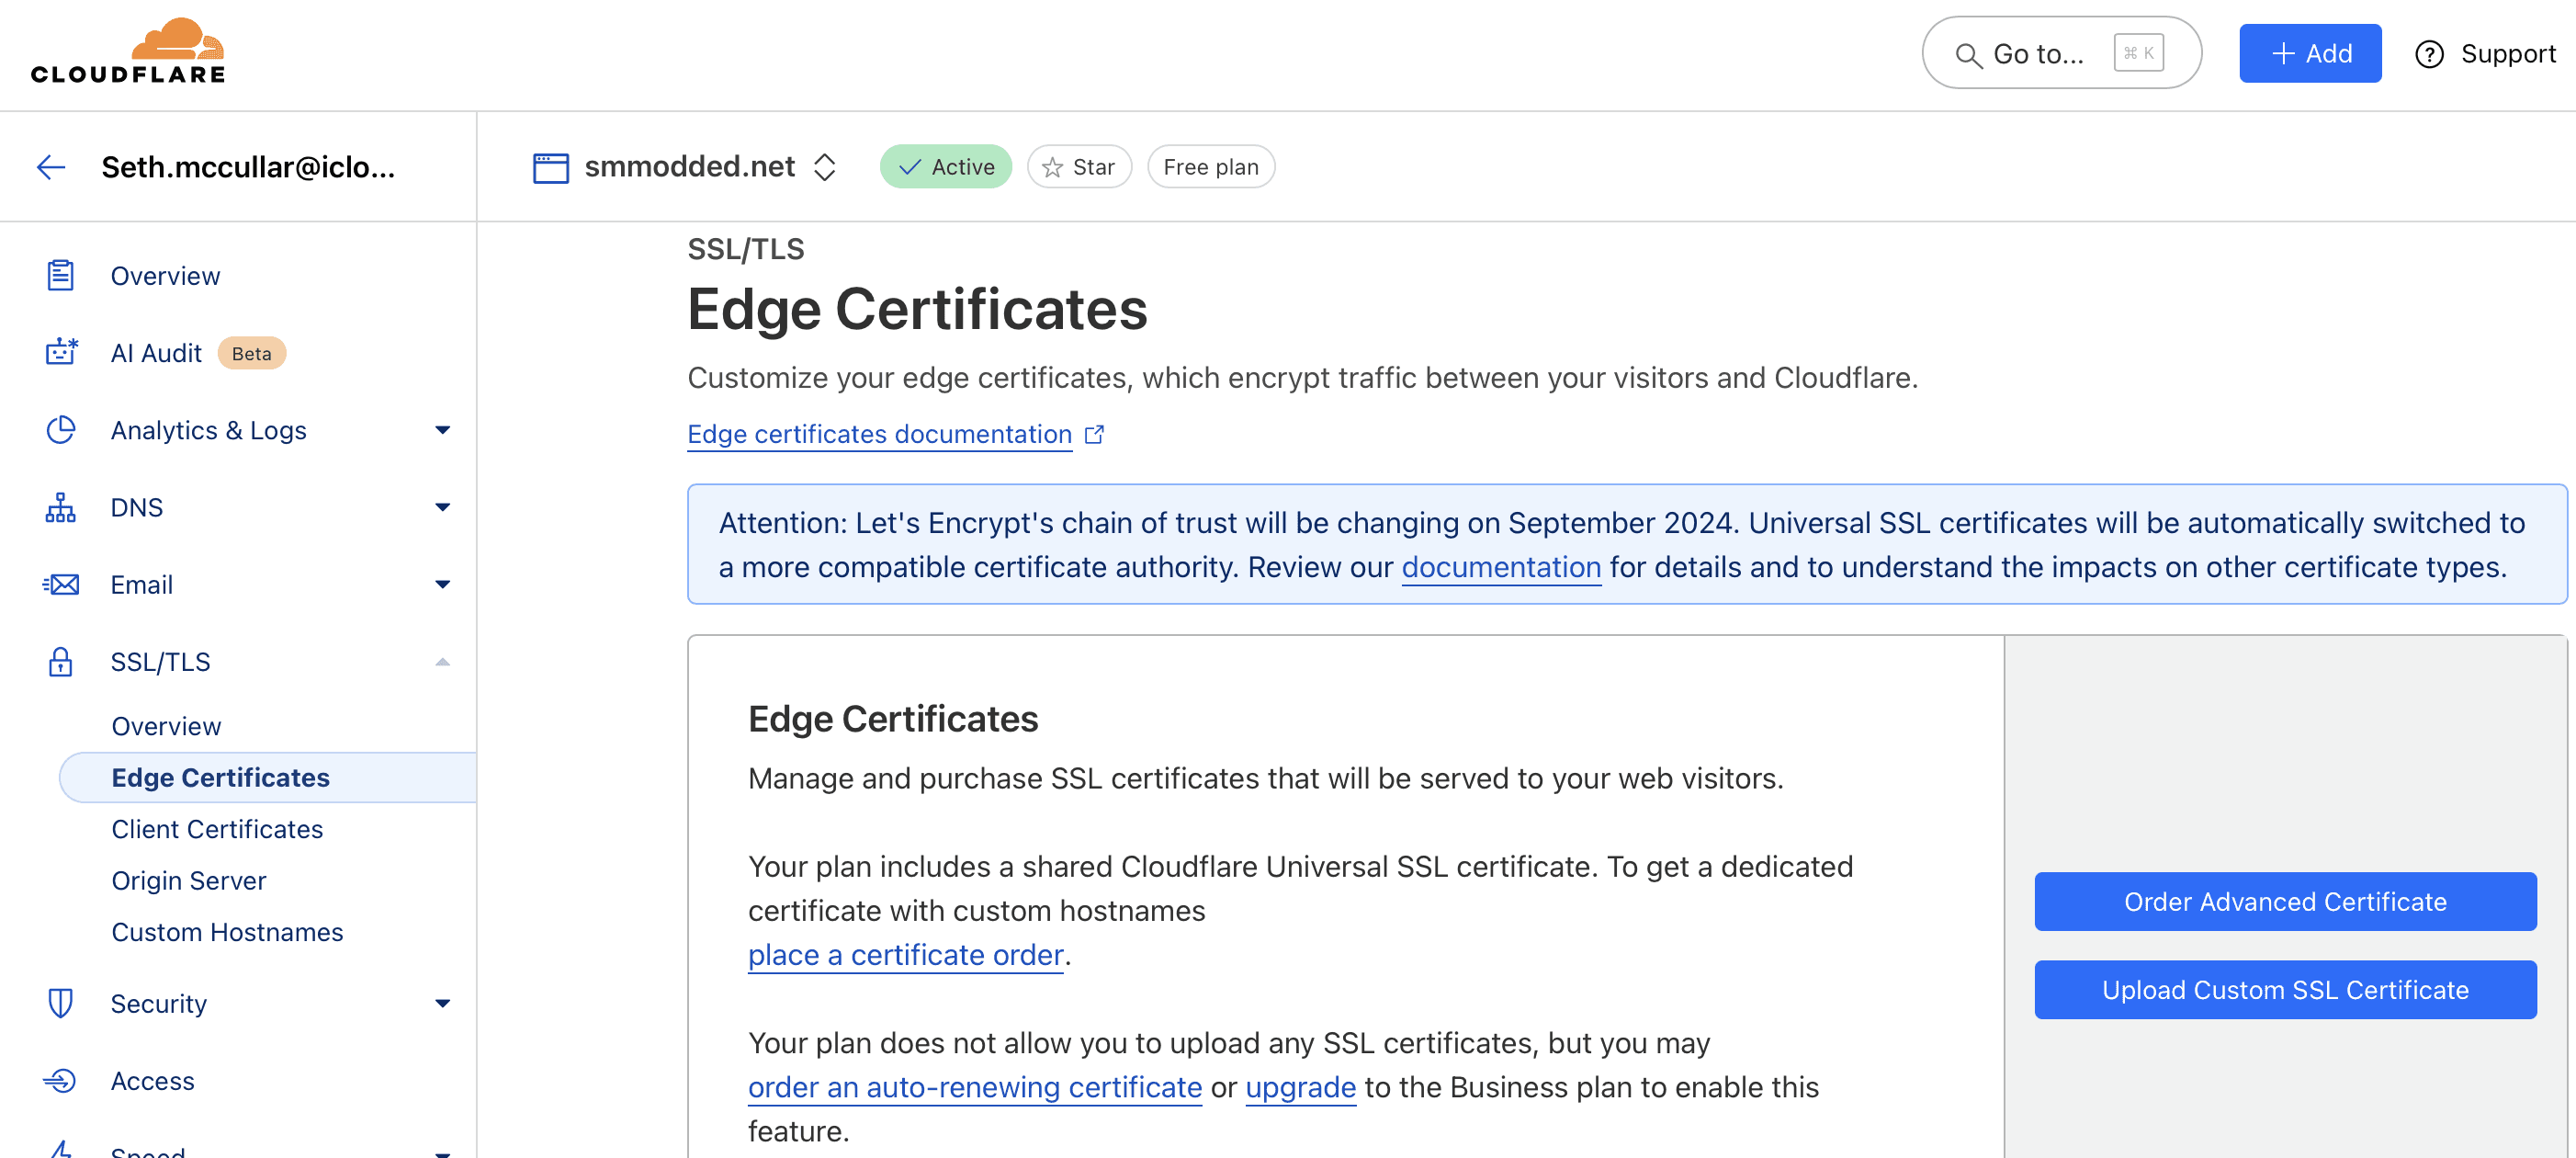
From the next page, we'll select certificates from Google Trust Services and specify that we'll need a certificate for all hostnames records using smmodded.net. We'll leave the default expiry of 3 months

Finally, we'll turn on Total TLS to ensure any proxied connections also have a certificate issued, and enable Always Use HTTPS

And that should be it! We can now test our slash command to make sure that the output is as expected within slack based on HostID

And to finish testing, we'll just navigate back to our Response actions history within Elastic Defend in our Kibana Dashboard to find the Ubuntu-user machine has been isolated in response successfully

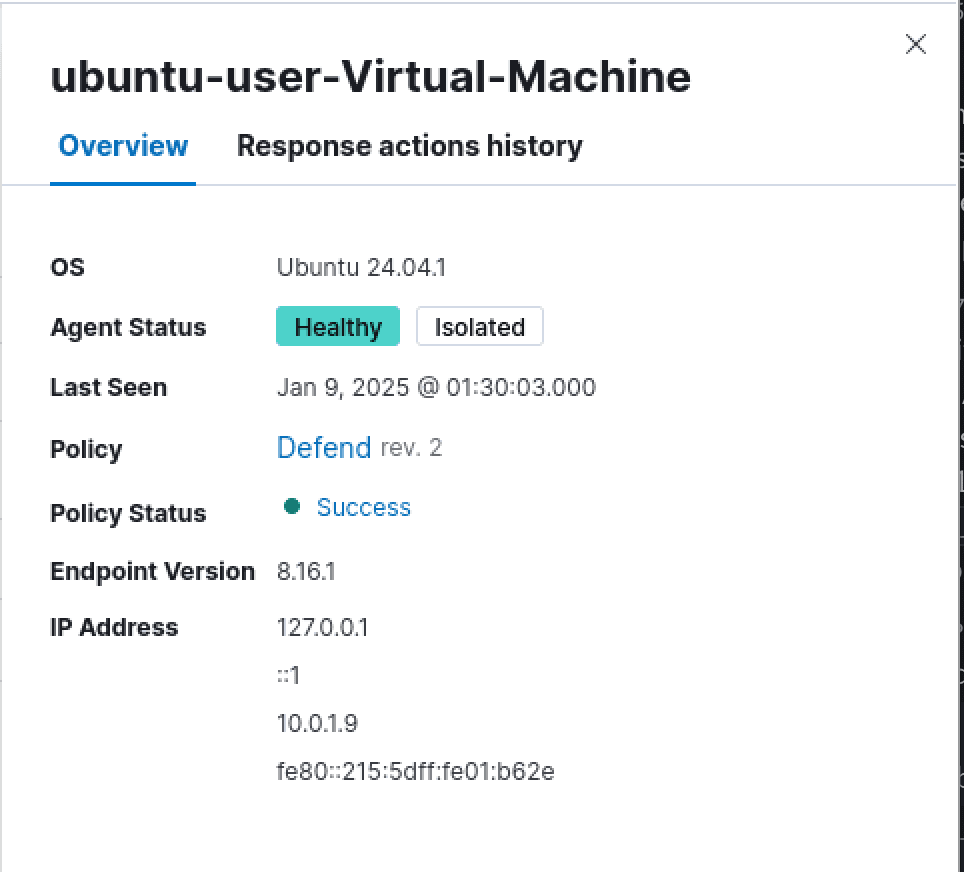
And as we can see it was a success! Slack was successfully able to send a POST request to our web app, which was forwarded to our Cloudflare tunnel connected back to our Kibana machine, and for the Kibana API to successfully isolate the machine using Elastic Defend

Conclusion

This project demonstrates a fully automated SOAR workflow that integrates Slack, Elastic Defend, Cloudflare, PythonAnywhere, and Kibana to detect, alert, and respond to malware threats in a streamlined and efficient manner. By leveraging the power of Elastic Defend’s EDR capabilities, security teams can identify threats in real time, receive alerts via Slack, and take immediate action using a custom slash command (/isolate) to contain compromised endpoints.

Through a carefully structured implementation, we achieved:


- Automated detection of malware activity using Elastic Defend on an enrolled endpoint.


- Real-time alerting via a Slack Connector in Kibana, ensuring security teams are instantly notified.


- Secure and scalable command execution via a PythonAnywhere-hosted Flask app, processing Slack /isolaterequests.


- Reliable API communication between Slack, PythonAnywhere, and Kibana through a Cloudflare Tunnel, allowing external request handling while keeping Kibana securely internal.


- Domain management and security enforcement through Cloudflare DNS, TLS/SSL certificates, and web traffic protection.


-  Endpoint isolation via the Kibana API, effectively cutting off compromised machines from the network, reducing potential damage.


Real-World Applications


This workflow mirrors real-world SOC automation strategies, where time-to-response is critical. By eliminating manual intervention and automating endpoint isolation, security teams can:

  • Reduce incident response time from minutes to seconds.

  • Minimize human error in containment decisions.

  • Ensure immediate response to malware threats, preventing lateral movement.

  • Improve operational efficiency, allowing SOC analysts to focus on higher-level investigations.